Wooden Paddles Build
Posted: Thu Dec 27, 2012 4:15 pm
The Cape Fear is a fast boat and great looking Yak but the aluminum paddle just seems to take away something from the boat so I decided to fix that.
Goal a 244cm wooden yak paddle.
First I buy 3 very expensive 8'X8"X 5/8" cedar fence slats. Must have set me back $9.00 or so. Picked one of darker heart wood and 2 lighter color.

I designed and cut 1 of the outside slat and used it for form guide of the other 2.

At this stage they all 3 have the desired finished shape of the blades included.

After the inside slat of dark wood is cut to shape I reduce the shape of the outside slats by trimming the blade into a blade brace for strength and strengthening shape.

Now it is time to assemble the package.

The slats are extremely green so I have already spent a lot of time (weeks) drying even using a heat gun to speed things up a little,

Now the fun begins, shaping this virtually square thing into a paddle. Praise God for sharp planes and lot of sand paper.

I can't believe how much planing, sanding and rasping it actually takes but after I took down the mass of corners I used mostly a small palm plane and it worked great.

The brace portions are tapered to blend and a small, paper thin, dark wood strip added for accent.

Epoxy resin is used to seal the wood and waterproof it.

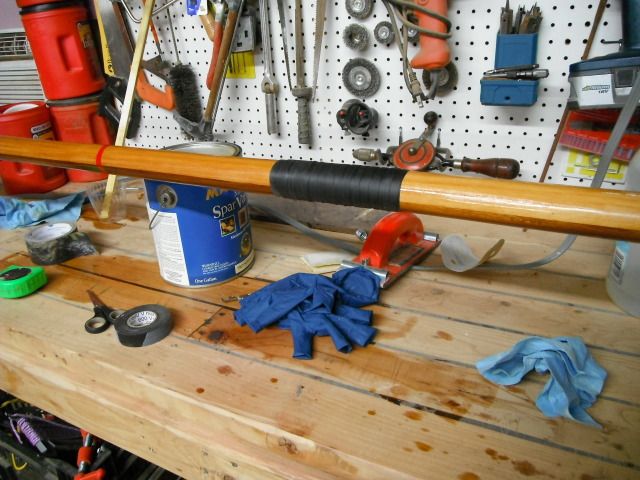
Then the varnish is applied to finish it out. Electrician's rubber tape is added to form hand cushions.

Then I started the second stage. The Spare Tire.


I didn't waste epoxy resin on this paddle because it is just a cheap spare for emergency only. 30" long and 6" wide. Stows inside the front hatch nicely out of the way and wiating just in case something happens to big sister.
Goal a 244cm wooden yak paddle.
First I buy 3 very expensive 8'X8"X 5/8" cedar fence slats. Must have set me back $9.00 or so. Picked one of darker heart wood and 2 lighter color.

I designed and cut 1 of the outside slat and used it for form guide of the other 2.

At this stage they all 3 have the desired finished shape of the blades included.

After the inside slat of dark wood is cut to shape I reduce the shape of the outside slats by trimming the blade into a blade brace for strength and strengthening shape.

Now it is time to assemble the package.

The slats are extremely green so I have already spent a lot of time (weeks) drying even using a heat gun to speed things up a little,

Now the fun begins, shaping this virtually square thing into a paddle. Praise God for sharp planes and lot of sand paper.

I can't believe how much planing, sanding and rasping it actually takes but after I took down the mass of corners I used mostly a small palm plane and it worked great.

The brace portions are tapered to blend and a small, paper thin, dark wood strip added for accent.

Epoxy resin is used to seal the wood and waterproof it.

Then the varnish is applied to finish it out. Electrician's rubber tape is added to form hand cushions.

Then I started the second stage. The Spare Tire.


I didn't waste epoxy resin on this paddle because it is just a cheap spare for emergency only. 30" long and 6" wide. Stows inside the front hatch nicely out of the way and wiating just in case something happens to big sister.