Page 1 of 9
Muskoka in the Philippines
Posted: Thu Apr 12, 2007 7:40 pm
by lncc63
Started building a Muskoka this week. Should be ready to do the cutting on Sunday. Actually, I could be cutting her panel's tomorrow but we're making ten small dingy kits for our group's 1st Family Boatbuilding Weekend on the 21st. The more the merrier.
I don't have pictures to show just yet but I'll try to get some in next week.
One thing I'd like to share though is how we're doing the plotting. This is a good way to not to have be on one's hands and knees or have a large table you'd often have to reach over. What I've been doing this time, this my 2nd boat by the way, is to stand the sheet on its wide edge. Having the sheet in a "drafting table" position is, IMHO, optimum. To connect the dots, I use 1" finishing nails and a length of PVC electrical molding that has a rectangular section as a batten. I use plastic clamps to hold the batten in place so this is also done without moving the sheet. The PVC by the way is the kind that is in two pieces so it readily bends even though the section is rectangular.
I'd also like to report this preliminary QA step I've started doing: I measure and make sure the width's of panel halves that will be butt joined are equal. I found an error last night this way. Of course I still remeasure each and every coordinate.
I'm so happy I'm building again. Thanks Matt for putting together such fantastic plans. IMHO, the clarity and thoroughness of your plans are second to none.
Posted: Sun Apr 15, 2007 8:22 pm
by lncc63
Some pictures as promised ...
Position of the sheets for drawing, easier on my poor back:
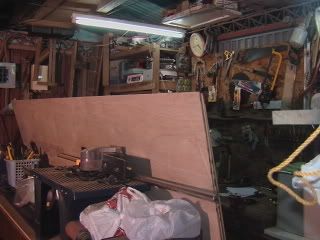
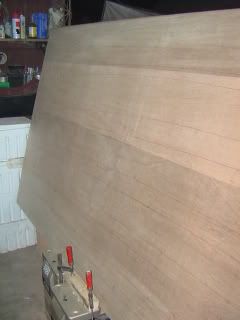
So far we've done 2 sets of bottom panels, a transom and the molds:
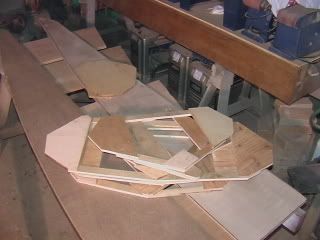
To make life easier, after cutting a front and rear bottom panel, we used a router with a template guide to cutout the other pieces. The template guide idea was not so hot because at one point the router got away

(not enough bottom support):
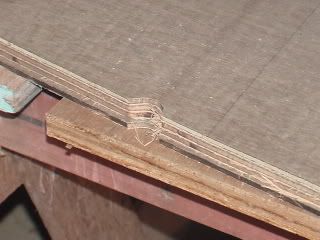
Luckily easy enough to repair.
Anyway after the mishap, we instead used a jigsaw to rough cut, nailed the rough cut panel to a finished one and used a trimming bit on the router table. Finished all eight bottom panels for the two canoes in about 2 hours.
Posted: Mon Apr 16, 2007 1:29 am
by stevesteve
Looking good.
I like the idea of using the router for cutting out sheets using a template. During my build I have found that there is little that can't be fixed by using the filleting mix (I managed to over power-plane the edge of a panel and left a dip

).
Posted: Sun Apr 22, 2007 1:54 pm
by lncc63
I too have faith in putty ... one of god's gifts for sure.
Finally found a whole day to work on the canoes

. Starting from 7 am, by 7pm I had this neat little stack of panels:
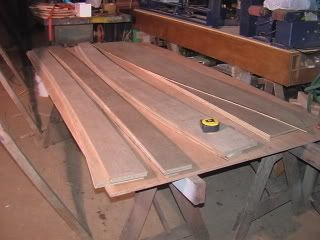
All the side panels where cut with a Japanese hand saw. I recommend these to anyone who needs to make fine cuts ... but this is another story. I only cut one set and again used a laminate trimming bit on a router table to make the three other sets. Three because I am making two canoes.
This time however, instead of using a template guide with a router, I did the rough cuts with a jigsaw, much faster AND easier to control. To do this this I nailed the hand cut panels onto a stack of 3 sheets of plywood and cut around them with about 1/4" allowance.
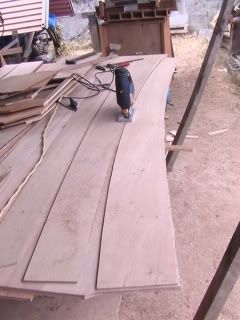
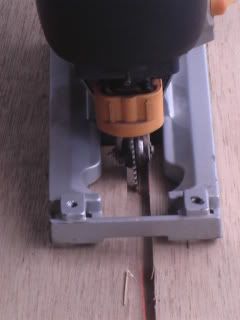
Over the next few evenings I hope to have them butt joined.
Posted: Sun Apr 22, 2007 3:07 pm
by Kayak Jack
I concur about a Japanese hand saw. I have to get mine re-sharpened. Bought it about 43 years ago in Japan.
Posted: Thu Apr 26, 2007 9:22 am
by lncc63
Did the repair of the broken panel by putting a piece a of glass over the break. The result seems a bit stiff but we'll see if it bends easy enough.
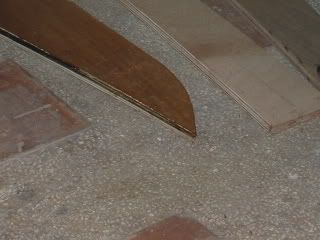
Today we did all the butt joints. We're using glass instead of wood only because I'd like to get some experience with the glass butt joints. After about 4 hours we had the first side all 16 panels of the two canoes done.
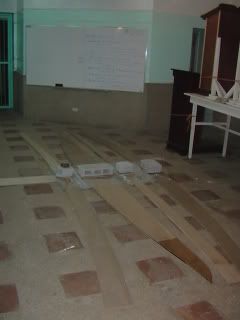
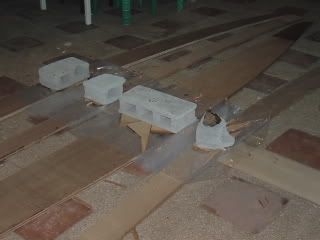
The panels are stacked 4 high. We decided to stack them so they'd all be perfectly identical. Each panel is separated from the other by a plastic bag.
Tomorrow we'll do the other side.
Posted: Thu Apr 26, 2007 11:00 am
by Kayak Jack
You may be putting too much weight on those joints. You can squeeze an epoxy joint too tightly and result in a glue-starved joint.
Posted: Thu Apr 26, 2007 6:48 pm
by lncc63
Thank you for the concern Kayak Jack. Those hollow blocks, as we call them here in the Philippines, are pretty light. I've not measured their weight but I'd say a full sized one is not more than 4 lbs.
Is there are recommended pressure?
One thing I do not like about these hollow blocks is that they shed sand particles which can sometimes contaminate the surfaces. The pieces are easy enough to remove but they are still a hassle.
Posted: Thu Apr 26, 2007 8:27 pm
by Kayak Jack
Try painting or varnishing all surfaces of the blocks. That oughta hold in the grit.
Only enough pressure to hold stuff in place, plus just a teensy weensy bit more.
Posted: Fri Apr 27, 2007 8:35 am
by surfman
As far as the broken panel is concerned, how hard would it be to just cut out another piece? Are you out of plywood? If it turns out to be too stiff and won't work you have put a lot of work into it for nothing. I had a heck of a time getting the lower bow panel to bend on mine I can see how this may cause some grief. Maybe you could use the piece for scrap for other smaller parts? Just a thought. I hope it works out.


