Page 7 of 8
Posted: Sat Jan 05, 2008 8:05 am
by hairymick
Been working on the cockpit and hatch coamings all day, - between mowing the bloody grass. Iglued them up in successive layers over the last couple of days after work, then spent the morning todat sanding them down. (I bloody hate sanding

Finally got the build up layers fairly pretty. I mate my coaming strips 1/2 wide this time. (a little narrower that I have in the past) Still seems to be plenty strong enough.
I didn't have any 6mm (1/4") ply so I used 4.. (5/32") stuff instead and added an extra layer of ply. Still very close to the specified height.

Coaming lip is also glued on.

Posted: Sat Jan 05, 2008 9:57 am
by jem
no problem going a little narrower on the lower coaming strips Mick.
Only reason plans show 1" is that when you start having to cut long, curved, narrow pieces, they become a bugger to work with without running the risk of snapping them. Especially during the actual cutting.
You could probably have the top coaming layer at 1" width. You just want to ensure there's at least a 1/2" difference in width between the lower coaming layers and upper coaming layers to deflect water and to attach a spray skirt (if desired).
Posted: Sun Jan 06, 2008 1:09 am
by hairymick
Thanks Matt,
I cut the coaming lipas per the drawings but the build up layers, I cut from off-cuts and did staggered joints. I have a lot of off-cuts now and used them istead of cutting up big panels.

Easy to do, simply lay the coaming edge on the ply, mark out and cut.
Final coat of epoxy is on. Yay!!!

Fitting thigh braces now.


Will start painting and varnish later in the week.
Posted: Thu Jan 10, 2008 6:17 am
by hairymick
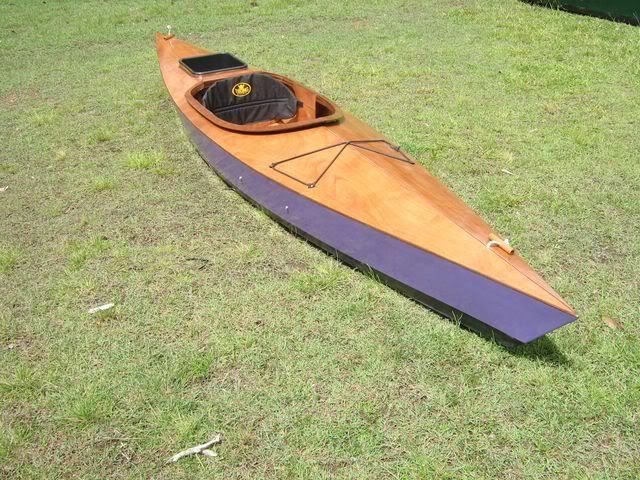
Started painting today. three coats of this.
God I hate the colour.

Posted: Thu Jan 10, 2008 10:09 am
by jem
Mick, is she going to make you do the poke-a-dots?
Posted: Thu Jan 10, 2008 12:13 pm
by Oldsparkey
hairymick wrote:Started painting today. three coats of this.
God I hate the colour.
MICK..... Nice color , now I am hungry for a grape pop sickle.
Robin is one Smart Lady , my hat is off to her , that is one sure fire way to make sure you don't paddle her boat.
I will bet if you are not nice to her she will tell everyone it is yours when out paddling.
Chuck.
Posted: Thu Jan 10, 2008 1:01 pm
by tx river rat
would have loved to have see the look on your face as you put the first couple of brush strokes of paint on.
Ron
Posted: Thu Jan 10, 2008 3:01 pm
by sheena's dad
Mick....
The missus passed by the 'puter while I was looking at your paint job. She gives Robin's choice of color a big thumbs up. Geez, there's no accounting for taste, is there?
Posted: Sat Jan 12, 2008 1:48 am
by hairymick
Matt wrote
Mick, is she going to make you do the poke-a-dots?
I'm working on some designs for air brushing on to the purple mate. Will take a little time to practice the processes.

Actually, the colour is starting to grow on me.
Foot braces are in.
I love these Duckworks footbraces. They can be easily adjusted while seated in the boat. they could also bbe easily fitted to rudder control cables. Will definately be getting more of these.

Some one asked the question why the cut out in the thigh braces? but I forgot to answer - sorry mate. All the cut-out is for is for easier adjustment of the side ties for the back band.

There are also two tie-backs for this back band. The rear bulkhead is the ideal place to tie them off. By proper sighting of the tie-backs, the seat back band holds itself in place and up where it is needed against the back. I added a couple of slotted backing plates, just for a little extra strength.

Glove box up and out of the way.

Posted: Sat Jan 12, 2008 2:00 am
by hairymick