Page 6 of 11
Posted: Tue Feb 26, 2008 6:25 am
by hairymick
G'day Bemm,
Thanks and welcome aboard mate.
Feeling a bit better today - thanks.
I found my way to the West System after some pretty ordinary results with other epoxy.
At the time, I was develloping an epoxy safety training package for my work, and Scott Alexander of ATL Composites, here in Oz was very helpful, so much so, I just wouldn't feel right buying my resin anywhere else. Will definately ask him about 205 and 206.
He recommended I use the 207 and I tried it, loved the results and haven't used anything else since. In normal conditions, I have enough time to work with the resin, but this time, every thing that could have gone wrong - did.
I reckon my haste in trying to do the whole boat at once has added another 15 hours to the build.
I sanded the inside for about 6 hours today and am probably approaching the half way mark.
I think with he next canoe build, I will glass the outside and tape the inside seams.
I can feel another Duckworks shopping spree coming on.

Posted: Wed Feb 27, 2008 7:39 am
by hairymick
OK,
A few more thoughts.
I had a bit of a rest day today and didn't do much.
Yesterday, when fitting the outer gunwhale. I had a fet problems. With the tumblehome panel, combined with the modest rise to the top of the stems, greates a significant edge bend in the gunwhale timber.
My spring clamps were not up to the task of holding the gunwhale in place and i had to improvise, screwing the gunwhale into place through the hull.
This worked well but was very time consuming. it took several hours to do both sides. Screws were placed 3" apart which was the distance I wanted to place my spacers.
Last night, after the glue had had several hours to set up, I removed the screws, applied epoxy/woodflour to the pre drilled spacers and then re-screwed to hold them in place. easy.
I used flange headed, phillips drive screws. Ideal for a battery drill.
I slept in this morning, and the resin had much longer to go off than I had planned.While attempting to remove the screws, A lit of screws chewed out in the driver slots and others broke the head off my driver bits. - all of them. I think I managed to get about 2/3 of them out with the battery drill. ( There are 98 spacers in all.) The rest, I had to cut a slot in the screw head with a hack saw blade and then unscrew by hand.
Lessons from this - Don't use cheap screws or driver bits. Don't sleep in and leave the resin time to properly cure before removing the screws.
Hope to get a bit more done tomorrow.
Posted: Wed Feb 27, 2008 7:40 am
by hairymick
OK,
A few more thoughts.
I had a bit of a rest day today and didn't do much.
Yesterday, when fitting the outer gunwhale. I had a fet problems. With the tumblehome panel, combined with the modest rise to the top of the stems, greates a significant edge bend in the gunwhale timber.
My spring clamps were not up to the task of holding the gunwhale in place and i had to improvise, screwing the gunwhale into place through the hull.
This worked well but was very time consuming. it took several hours to do both sides. Screws were placed 3" apart which was the distance I wanted to place my spacers.
Last night, after the glue had had several hours to set up, I removed the screws, applied epoxy/woodflour to the pre drilled spacers and then re-screwed to hold them in place. easy.
I used flange headed, phillips drive screws. Ideal for a battery drill.
I slept in this morning, and the resin had much longer to go off than I had planned.While attempting to remove the screws, A lit of screws chewed out in the driver slots and others broke the head off my driver bits. - all of them. I think I managed to get about 2/3 of them out with the battery drill. ( There are 98 spacers in all.) The rest, I had to cut a slot in the screw head with a hack saw blade and then unscrew by hand.
Lessons from this - Don't use cheap screws or driver bits. Don't sleep in and leave the resin time to properly cure before removing the screws.
Hope to get a bit more done tomorrow.
Posted: Wed Feb 27, 2008 9:26 am
by Oldsparkey
I know it is to late to say this but I will.
A while back I was ... advised ....told .......made aware........
When doing the stitches with the coper wire and the epoxy sets before the wire is removed a small amount of heat applied to the wire will let it come out without any problems.
The heat from the wire softens the epoxy which is holding the wire but not the epoxy holding the wood.
It appears that with a screw that is set in the epoxy a small amount of heat applied to the head of it would make it easier to remove. A electric soldering iron might be the item to use , apply the tip to the head of the screw , wait a few seconds to warm it and see it it helps , don't touch the wood.
Just warm it don't get it hot.
Chuck.
Posted: Wed Feb 27, 2008 3:49 pm
by hairymick
Thanks Chuck,
Good tip.

Posted: Wed Feb 27, 2008 5:20 pm
by Oldsparkey
hairymick wrote:Thanks Chuck,
Good tip.

Sorry about that Mick , as normal I was a day late and a dollar short with it.

Chuck.
Posted: Thu Feb 28, 2008 5:21 am
by hairymick
Heya Chuck, no problem mate. Now I know for the next one.

Bit more done today.
Last of the patches, Yay!!!

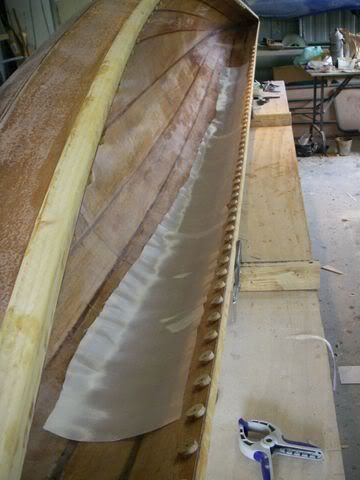
Mini deck sheer clamps and deck support cross members are fitted and in.
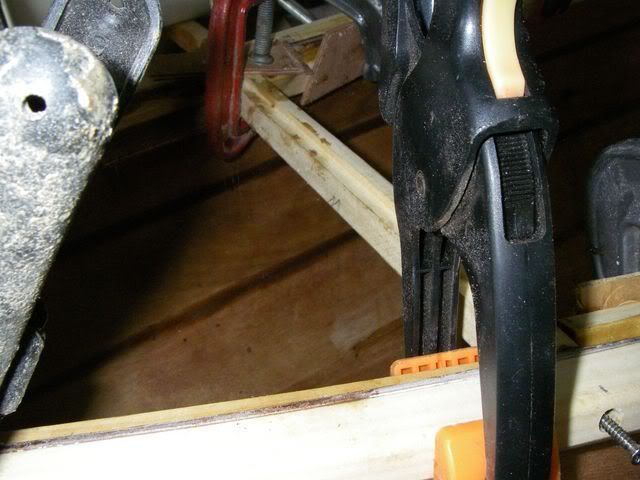
Inner gunwhales are fitted and in. (spam of a job) I need more clamps that are bigger and stronger.
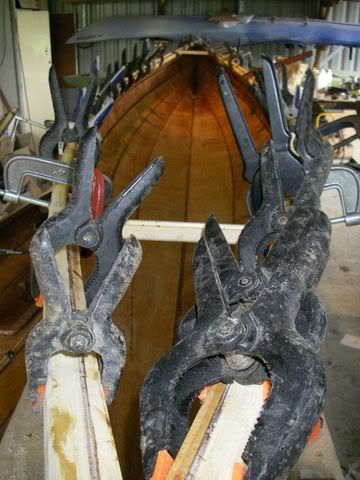
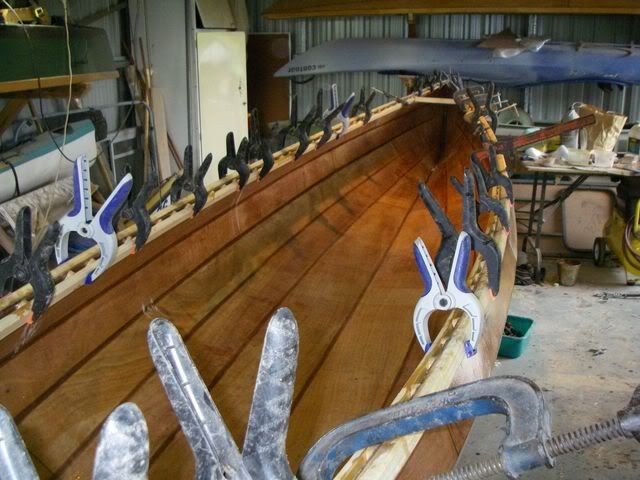
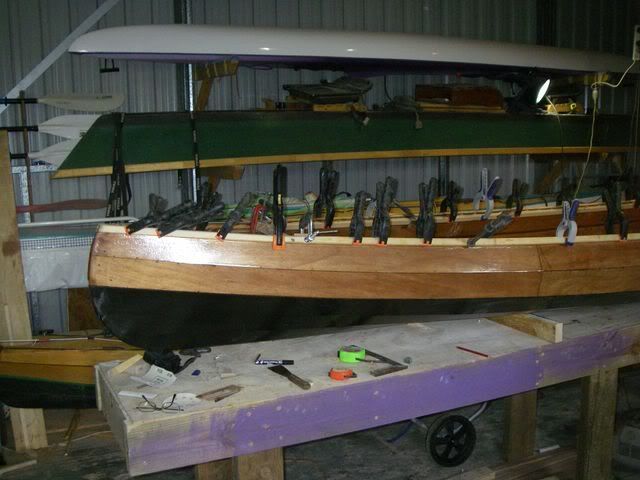
Still pondering about thwarte placement and seats. Will think on it over the next few days at work and see what I can work out.
Posted: Thu Feb 28, 2008 9:50 am
by tx river rat
Mick
That boat is really looking good . I am not into canoes for my part of the world but if I was that one would be a keeper. good job mate
Those c clamps will do the job ,you just need more of them

Ron
You have to be thinking about it.....
Posted: Thu Feb 28, 2008 10:14 am
by LEE SCHNEIDERMANN
Mick,
I just can't help but see a drop-in sailing rig with out-riggers on that boat.
It's a beautiful build by the way! I think Robin better have a rear-view mirror so she can make sure she's not doing all the paddling!


Lee
Posted: Fri Feb 29, 2008 5:40 pm
by Tor
Great looking canoe Mick,
I notice the spacers you have used are round presumably to aid drainage, looks like a great idea which I think I'll try, how did you make the spacers?
I know you didn't want the problems with the screws but I will have a similar problem with the edge bend (and mine are at least 1.5" deep so don't wan't to bend), hopefully I'll avoid the same problems you've had.
Look forward to the first reports (and Matts smaller version


)
Tor


