Posted: Sun Feb 10, 2008 9:10 am
Martin,Martin in Fonthill wrote:Hello Lee, Looks like a beautiful job. How did you fasten the first row of strips on the deck? also did you have the strong back sitting inside the hull and then
fit the forms to suit? The reason I am asking is that I started to do what you did and then ran out of patience and put the plywood deck on my freedom.
In a couple weeks when the weather will warm up a bit I am going to build a Laker and want to strip the deck.
Martin
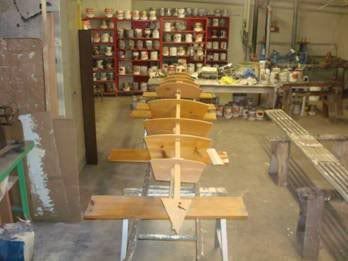
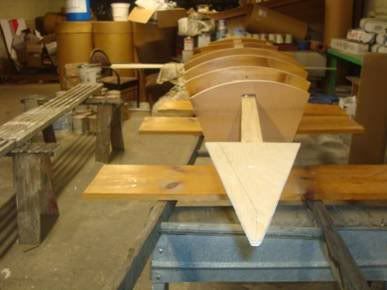
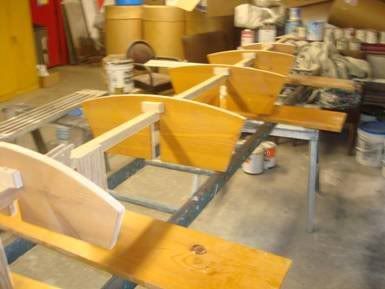
I started by using the temporary forms that I'd cut for the stitching. I cut down into the center of those to hold the 2X2's in place along the center-line of the hull. That was in two seperate lengths of 2X2 that overlapped near the buttjoints of the plywood, in the cockpit area.
At the bow and stern I used a piece of drop-off plywood scrap, traced along the outside of the hull, and then cut those so I could screw thru them to hold the 2X2's up at the ends. The screws pulled the 2X2's up against the shear strips, giving a sort of clamping action to that area.
I'll re-assemble the strongback and take a piccie to post so you can see what I'm trying to describe. (Picture's worth a thousand words for my money)
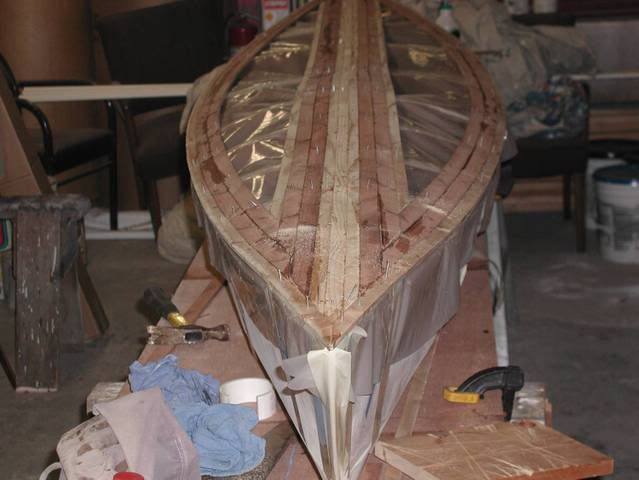
Once the 2X2's were secured, I arbitrarily picked points along thier length to install the rounded forms. It took alot of trial and error to come up with the "right" heighth for the forms. Once they were installed, I laid a cedar strip along the center-line, backed up to look at it to see if it looked "right" to the eye.(or my eye anyway)That process took more time than any other part of the build so far.(almost 4 hours before I liked what I saw)
I will tell you this about the forms, I had about half as many as I should have had to do this. If I ever do another stripped top, I'll double the number of forms I put in. It would have saved alot of time installing the strips.
The first strips were simply nailed into the shear with about 1/8th inch overhang. I used wire brads and left them sticking up so I could pull them after the glue dried. I used Tightbond III waterproof wood glue on the strip edges. It does take a little patience working alone while bending the strips, but it's relatively easy. If I can do it, anyone can.
Good luck with your Laker! I've had a professor here at the college approach me about helping him build one for our field station in the Boundry Waters.
Lee