Mate,
I do an end fillet.
I mix the wood flour as thick as I can so that it won't sag and wipe it into the bow with my finger tip.
I smooth it off with a spoon and try to clean up all woodflour that is not in the fillet itself BEFORE it sets. - works for me and is much lighter than a full endpour.
JT's Iroquois
-
tx river rat
- Posts: 989
- Joined: Wed Feb 21, 2007 10:48 pm
- Type of boat I like: <-- Please read instructions to the left and delete this text. Then, tell us what type boat you like! :-)
- Location: Tx
-
Kayak Jack
- Design Reviewer
- Posts: 1186
- Joined: Sun Jun 20, 2004 8:03 pm
- Type of boat I like: <-- Please read instructions to the left and delete this text. Then, tell us what type boat you like! :-)
- Location: South-central Michigan
Jeremy,
An end pour does a couple of things for you. One is, add strength to the ends. the fillet described on here will do that too.
The other thing an end pour does is provide a place to drill all the way through the stem end to put through a rope.
Put in your cardboard dam, mix up epoxy with wood flour tot he consistency of peanut butter, go along the joints and bottom of the dam. From then on, you can pour in dribbles and drabbles of epoxy left over from other jobs and just accumulate it until you have enough.
I prefer the hole for a rope to be down near the waterline of a fully loaded boat. then, if I have to line a boat through rapids it is better prepared.
Kayak Jack
Doing what you like is FREEDOM
Liking what you do is HAPPINESS
I spent most of my money on whiskey and women - and I'm afraid I just wasted the rest.
Doing what you like is FREEDOM
Liking what you do is HAPPINESS
I spent most of my money on whiskey and women - and I'm afraid I just wasted the rest.
-
Oldsparkey
- Design Reviewer
- Posts: 1272
- Joined: Sat Jun 19, 2004 11:08 am
- Type of boat I like: Wood boats .
- Location: Somewhere around Central Florida
- Contact:
I do the same as Kayak Jack , End pour both ends and then drill a hole threw them for the rope ( make sure to coat the hole with epoxy to seal it and the wood) , this way I know it will hold either tied off to the bumpers on the vehicle or to a tree on the side of the river overnight.
Chuck.
Chuck.
Remember:
Amateurs built the Ark...... Professionals built the Titanic
Visit some fine paddlers at The Southern Paddler
Amateurs built the Ark...... Professionals built the Titanic
Visit some fine paddlers at The Southern Paddler
-
jt
- Posts: 46
- Joined: Wed Dec 19, 2007 9:52 pm
- Type of boat I like: <-- Please read instructions to the left and delete this text. Then, tell us what type boat you like! :-)
- Location: Denton, TX
This is about where the end pour ended up...
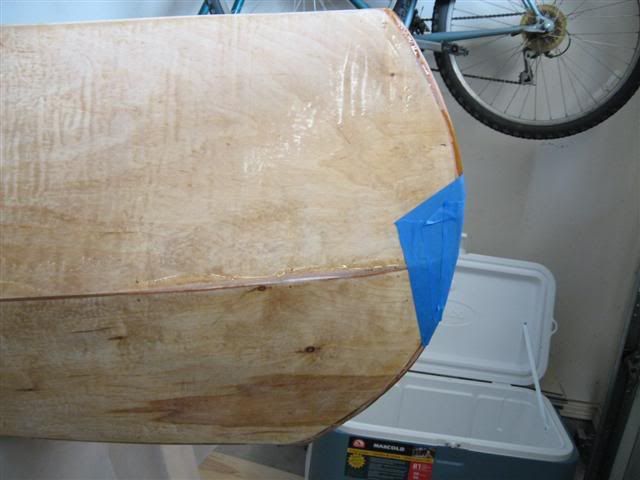
I was planning on drilling the hole just above the panel joint through the top panel, but am wondering if it should be lower???
Then, on to fiberglassing... Laid out the cloth dry--to smooth out and lie overnight... feeling a bit apprehensive...
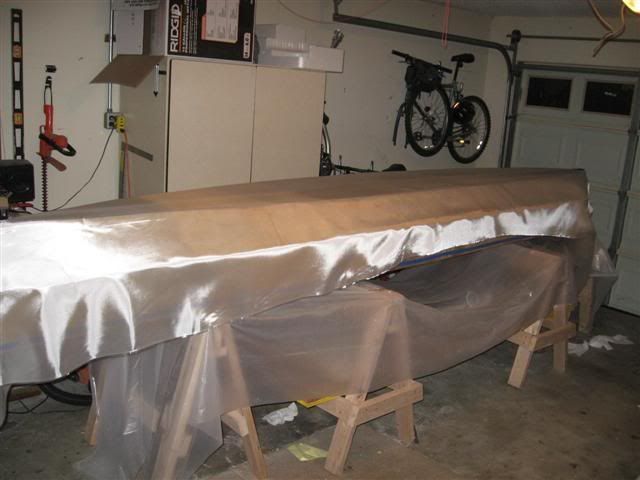
I followed the plans and ordered the 50" cloth, but it comes up a little short in the middle of the boat...
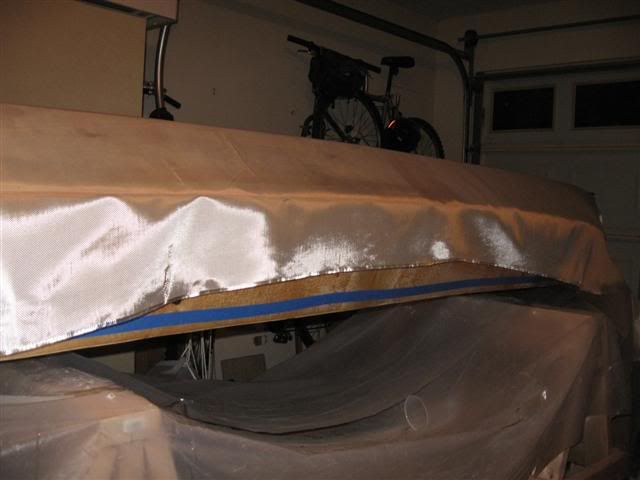
Will this need to be reinforced??? or is it high enough up not to matter?
Here's a shot after initial wet out (boat is upside down in pic for applying fiberglass--this is a close up of the top panel, with bare area for gunwhale)
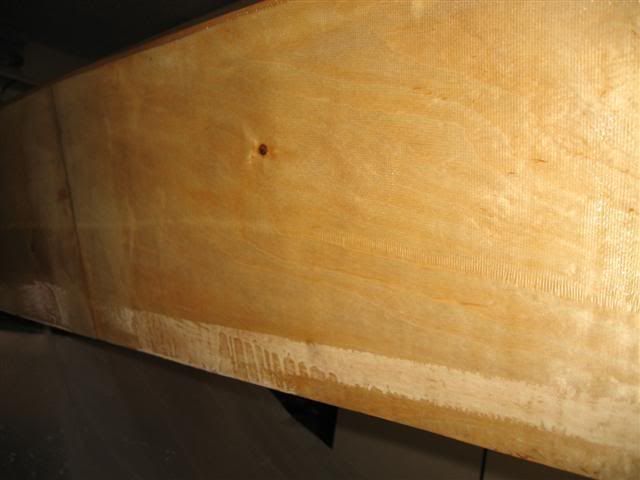
There's only a couple of inches between the edge of the fiberglass and the edge of where the gunwhale will go. Is it necessary to add a patch there?

I was planning on drilling the hole just above the panel joint through the top panel, but am wondering if it should be lower???
Then, on to fiberglassing... Laid out the cloth dry--to smooth out and lie overnight... feeling a bit apprehensive...

I followed the plans and ordered the 50" cloth, but it comes up a little short in the middle of the boat...

Will this need to be reinforced??? or is it high enough up not to matter?
Here's a shot after initial wet out (boat is upside down in pic for applying fiberglass--this is a close up of the top panel, with bare area for gunwhale)

There's only a couple of inches between the edge of the fiberglass and the edge of where the gunwhale will go. Is it necessary to add a patch there?
Jeremy
Live and learn...
Live and learn...
-
Kayak Jack
- Design Reviewer
- Posts: 1186
- Joined: Sun Jun 20, 2004 8:03 pm
- Type of boat I like: <-- Please read instructions to the left and delete this text. Then, tell us what type boat you like! :-)
- Location: South-central Michigan
-
jem
- Site Admin
- Posts: 4916
- Joined: Fri Jun 18, 2004 8:14 pm
- Type of boat I like: Wooden
- Location: Greensboro, NC
- Contact:
No problem. Typically when applying a patch, you want to overlap the cloth. But in this case, an edge-to-edge fit is fine and will be easier to fill in the weave of the fiberglass.jt wrote:Matt,
You're right there would've been a lot left over. As it was, I was able to trim some excess from the ends before wetting out, so I've got the patch and should be easy to apply. Just wasn't sure, being my first time...
-Matt. Designer.
-
jt
- Posts: 46
- Joined: Wed Dec 19, 2007 9:52 pm
- Type of boat I like: <-- Please read instructions to the left and delete this text. Then, tell us what type boat you like! :-)
- Location: Denton, TX
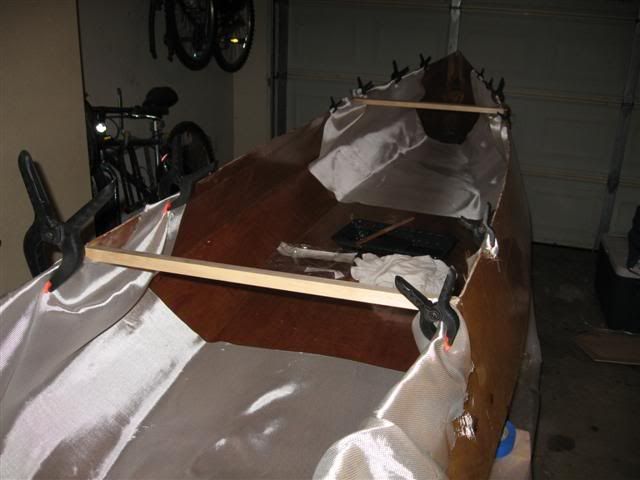
For glassing the insides, I did it in sections. This accomplished two things:
1. It was probably easier to do it in thirds rather than all at once, and
2. I was able to lay the cloth across the canoe, so I didn't come up short like I did when running it lengthwise. In the pic, the middle section has already been wetted once and cured.
I also did a patch over both the end pours.
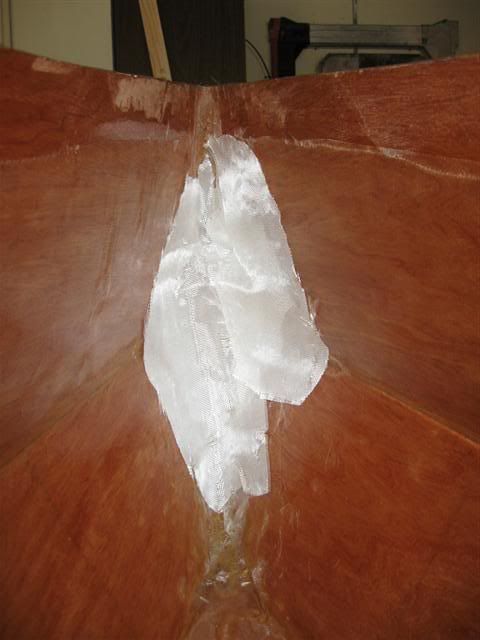
I'm not terribly worried about the appearance of the inside ends, as they will be behind a bulkhead...
1. It was probably easier to do it in thirds rather than all at once, and
2. I was able to lay the cloth across the canoe, so I didn't come up short like I did when running it lengthwise. In the pic, the middle section has already been wetted once and cured.

I also did a patch over both the end pours.

I'm not terribly worried about the appearance of the inside ends, as they will be behind a bulkhead...
Last edited by jt on Sat Apr 19, 2008 10:32 pm, edited 1 time in total.
Jeremy
Live and learn...
Live and learn...