Fredric
I started the ss@g a few years ago and love it , It really gives a stiffer boat than ply does aaand with wrc a lighter boat.
I glue up my strips into the shape I want, then run both sides through a planner. you dont need to glass them before you stitch the panels together.
Check out my ss@g Northwind ,it doesnt have a piece of wood in it longer than 8 ft.
Ron
Bluefin SS&G
-
tx river rat
- Posts: 989
- Joined: Wed Feb 21, 2007 10:48 pm
- Type of boat I like: <-- Please read instructions to the left and delete this text. Then, tell us what type boat you like! :-)
- Location: Tx
-
woodman
- Posts: 126
- Joined: Wed Nov 03, 2010 7:12 am
- Type of boat I like: plywood kayaks
- Location: KC.MO.
- Contact:
Re: Bluefin SS&G
On this 16' boat I edge glued and then sanding both sides on my 38'' drum sander... I was fearful at first but handling the pieces. I found them to be a lot stronger than you would expect I took them down to about 3/16'' ....


Re: Bluefin SS&G
Beautiful boats!
I guess I have to try to plane the panels before glassing! I hope I get the plans soon, looking forward to this build!
/Fredrik
I guess I have to try to plane the panels before glassing! I hope I get the plans soon, looking forward to this build!
/Fredrik
-
makenmend
- Posts: 179
- Joined: Tue Nov 03, 2009 2:29 pm
- Type of boat I like: kayak canoe
- Location: Longview East Texas
Re: Bluefin SS&G
Make sure you keep us updated with pictures.
MM
MM
Re: Bluefin SS&G
Let's have some pictures...
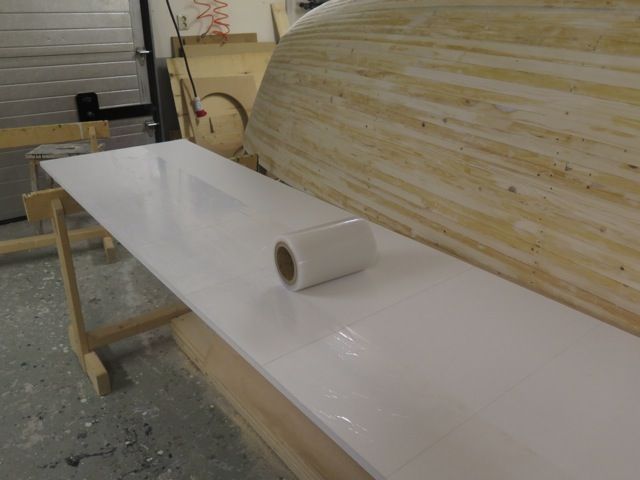
A simple glue/lamination table was prepared and wrapped in plastic. The dimensions are approx 2*17 ft
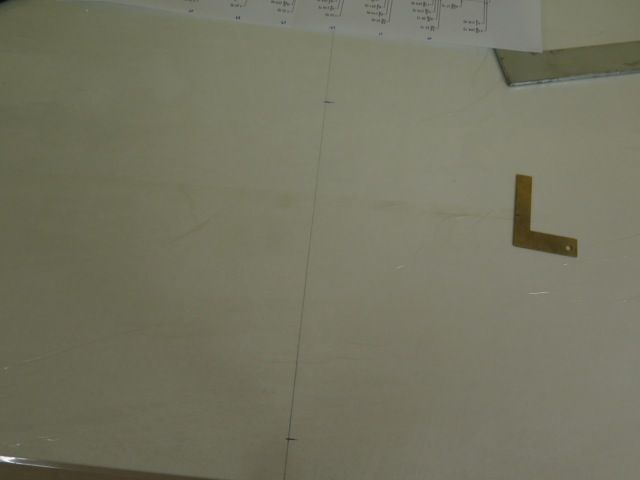
A grid was scribed and the pattern was transferred from the plans to the grid. At this stage, I just need the pattern to make sure that the panel will be large enough.
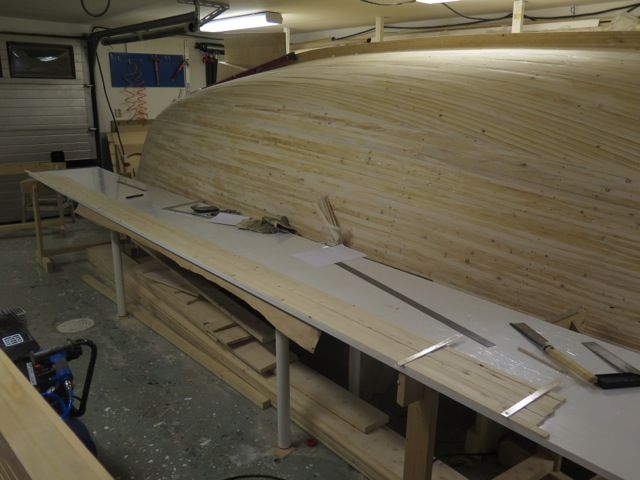
A strip was stapled to the base and the first batch of strips were dry-fitted. My planer can take a width of 10 inch so I must divide the glue-up in two batches.
The strips were marked with reference lines, removed, clamped together and the I added plenty of Titebond III
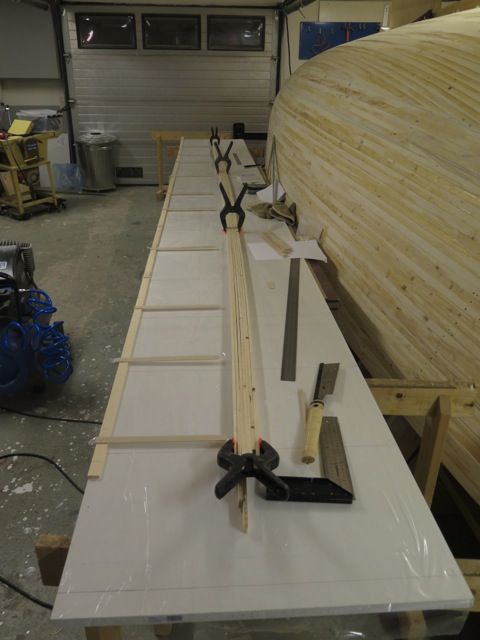
And then I stapled the panel using vertical strips wrapped in plastic...
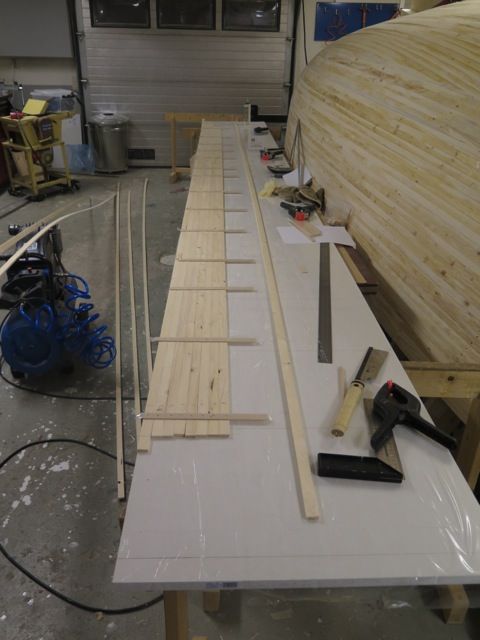
And then the second batch was glued. The joint between strip 8 and 9 is not glued...
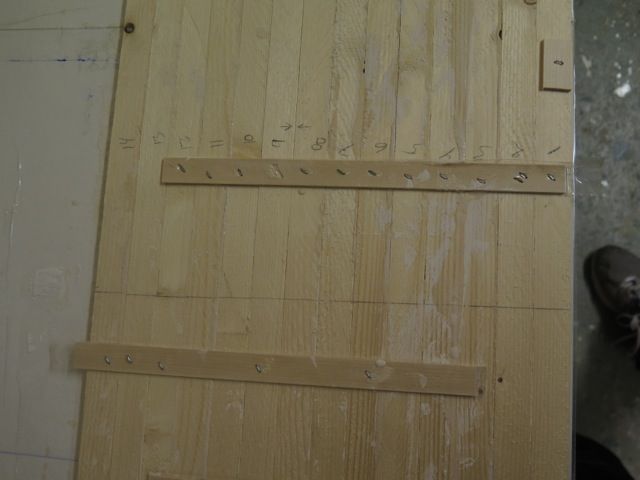
...cont
A simple glue/lamination table was prepared and wrapped in plastic. The dimensions are approx 2*17 ft

A grid was scribed and the pattern was transferred from the plans to the grid. At this stage, I just need the pattern to make sure that the panel will be large enough.

A strip was stapled to the base and the first batch of strips were dry-fitted. My planer can take a width of 10 inch so I must divide the glue-up in two batches.

The strips were marked with reference lines, removed, clamped together and the I added plenty of Titebond III

And then I stapled the panel using vertical strips wrapped in plastic...

And then the second batch was glued. The joint between strip 8 and 9 is not glued...

...cont
Re: Bluefin SS&G
....and 24 hrs later the staples can be removed and the panel can be separated into two parts...
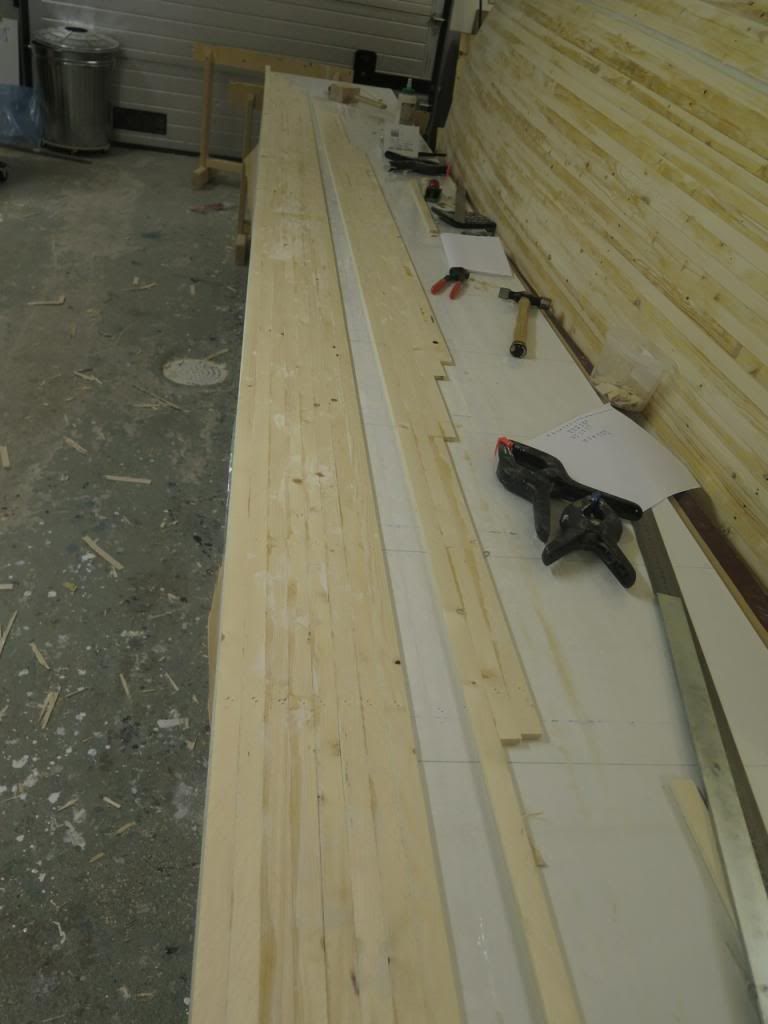
Planed down to 4 mm...
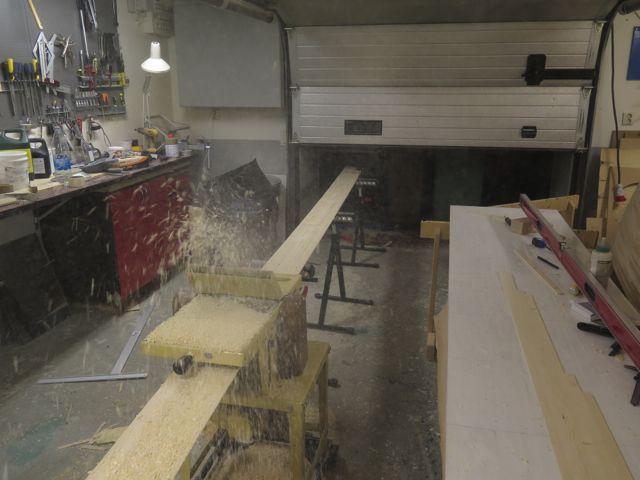
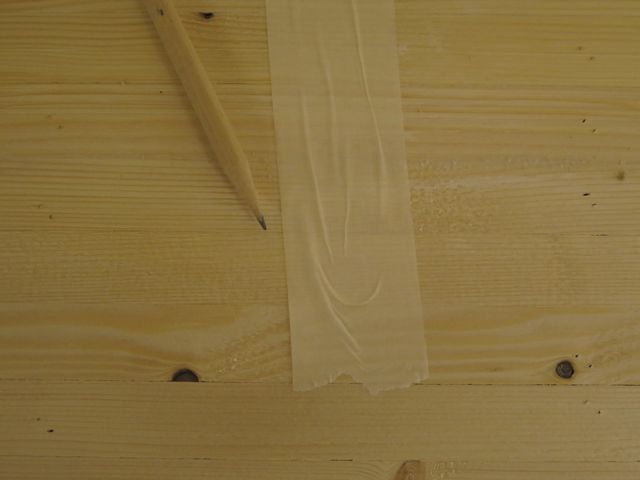
...and then glued together, this time using masking tape to provide some pressure on the joint...
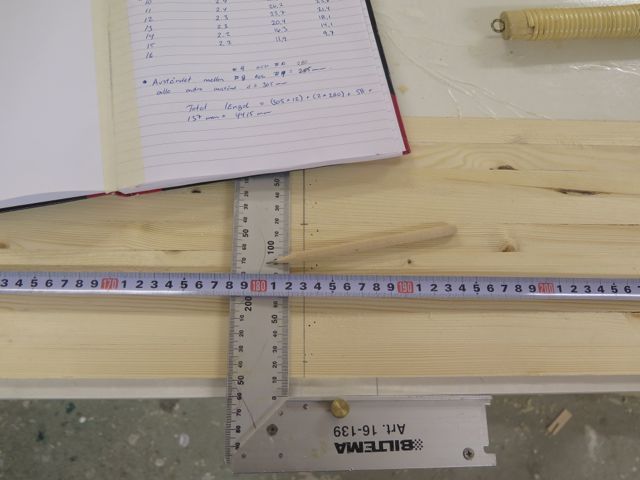
The pattern was scribed to the panel - this time very carefully...
Checked for fairness and then written to the panel..
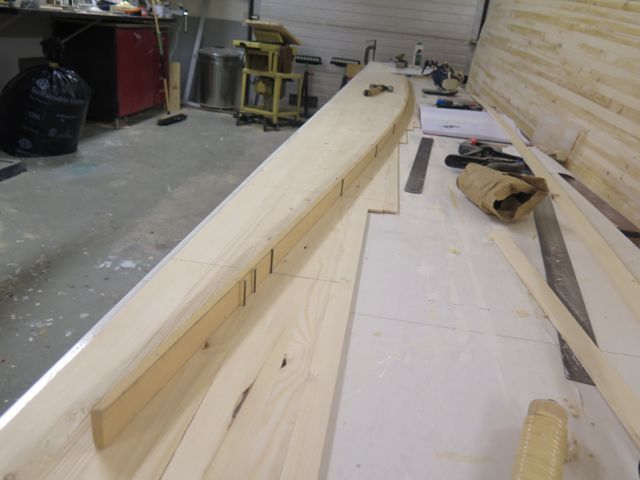
And finally I could do a rough shaping of the panel...
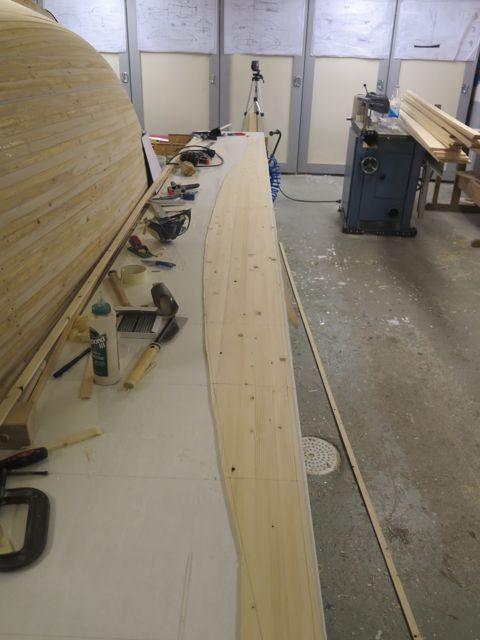
First panel done and everything went very smooth! Surprised of the stability of the panels!
/Fredrik

Planed down to 4 mm...

...and then glued together, this time using masking tape to provide some pressure on the joint...

The pattern was scribed to the panel - this time very carefully...

Checked for fairness and then written to the panel..

And finally I could do a rough shaping of the panel...

First panel done and everything went very smooth! Surprised of the stability of the panels!
/Fredrik
-
makenmend
- Posts: 179
- Joined: Tue Nov 03, 2009 2:29 pm
- Type of boat I like: kayak canoe
- Location: Longview East Texas
Re: Bluefin SS&G
Good start, I did some decks the same way in 2 half's so I could plane before joining.
For assembling /clamping the strips on the bench I used push pins, and keep on reusing for other panels.
[URL=http://s469.photobucket.com/user/m ... .jpg[/img][/url]
After assembly the panels are wetted down which caused the small pinholes to close, here's some panels drying out.
[URL=http://s469.photobucket.com/user/m ... .jpg[/img][/url]
What is the hull in the background ??
MM
Re: Bluefin SS&G
I'll try push pins - looks like a very good idea!
The hull is the beginning of a strip-built Paul Gartside #106 double ended cutter...


/fredrik
The hull is the beginning of a strip-built Paul Gartside #106 double ended cutter...
/fredrik
-
makenmend
- Posts: 179
- Joined: Tue Nov 03, 2009 2:29 pm
- Type of boat I like: kayak canoe
- Location: Longview East Texas
Re: Bluefin SS&G
''The hull is the beginning of a strip-built Paul Gartside #106 double ended cutter...''
very nice, Didn't put 2 & 2 together til now. followed your build on WB forum. bigger project than mine, I built a Core Sound 17' last year (with stripped decks) 7 month's start to finish (with some breaks) I'll continue to follow both builds.
[URL=http://s469.photobucket.com/user/m ... .jpg[/img][/url]
[URL=http://s469.photobucket.com/user/m ... .jpg[/img][/url]