Hi all;
Finally getting started on building the Wadefish 2.0 from a pre-cut kit.
It is a slightly modified version of the original Wadefish, hence the 2.0 moniker.
Below is a picture (from Matt) of the Wadefish 2.0 version.
It will have scupper holes, just shown with out because I will be adding them myself.
Of course, for those of you following along here is my disclaimer:
1. I am neither a professional kayak builder nor a kayak designer.
This Wadefish 2.0 will be my third built, but my first JEM Watercraft designed kayak.
2. I have thoroughly read the instructions and may, or may not, follow them explicitly.
3. Any deviations from the supplied instructions, in no way implies that any other way is
wrong or that my way is better. It is simply “what works for me”.
4. I accept any and all consequences that may come about due to my deviations.
5. I reserve the right to call for a “do over” when ever and as many times as I want.
6. I am not a kayak building machine like Mick . It wont be finished
in 3 weeks. Winter in Florida is the perfect time for building kayaks.
It is also the perfect weather for camping and paddling.
7. "Because" and "it just is" are totally acceptable answers to any questions that
may be brought up on this thread.
Stay tuned..DM
dangermouse01 builds a Wadefish 2.0
-
- Posts: 200
- Joined: Mon Jul 31, 2006 6:32 pm
- Type of boat I like: <-- Please read instructions to the left and delete this text. Then, tell us what type boat you like! :-)
- Location: Palm Bay, FL (east coast)
-
- Design Reviewer
- Posts: 1186
- Joined: Sun Jun 20, 2004 8:03 pm
- Type of boat I like: <-- Please read instructions to the left and delete this text. Then, tell us what type boat you like! :-)
- Location: South-central Michigan
-
- Design Reviewer
- Posts: 1272
- Joined: Sat Jun 19, 2004 11:08 am
- Type of boat I like: Wood boats .
- Location: Somewhere around Central Florida
- Contact:
DM.......
You will have one darn good boat when it is done , or when you are done.
As with any boat you build , read all of the instructions and then do it a couple more times so you understand them. Now if you make any changes to it ....... be very secretive about them till the boat is completed.
Boat designers do not really like changes made to there plans ..... Matt still has not forgiven me for the ones I made to the original Swamp Girl but if he ever paddled it like I do he would.
As I like to remind him , we start with the plans or kit and as the boat progresses we make some changes for ourselves to accommodate they way we want it. After all we are the ones paddling and using it. If we wanted one like all the rest of those thousands of cloned boats out there we would just get one off some showroom.
This makes it a customized boat built by that person and for that persons use , a one of a kind boat..... The best one in this world with Matt's help.
You will be in for a lot of thinking , fun and a little work (the fun type) then have an outstanding craft to use. Welcome to the sawdust and epoxy club.
Keep us posted on the progress and you have two web sites to help you.... just don't pay any attention to what Kayak Jack tells you ... Grits are not that good as a fillet material when mixed in the epoxy. Wood flour or some of the glass bubbles works a lot better.
Chuck.
Remember:
Amateurs built the Ark...... Professionals built the Titanic
Visit some fine paddlers at The Southern Paddler
Amateurs built the Ark...... Professionals built the Titanic
Visit some fine paddlers at The Southern Paddler
-
- Posts: 200
- Joined: Mon Jul 31, 2006 6:32 pm
- Type of boat I like: <-- Please read instructions to the left and delete this text. Then, tell us what type boat you like! :-)
- Location: Palm Bay, FL (east coast)
-
- Design Reviewer
- Posts: 1272
- Joined: Sat Jun 19, 2004 11:08 am
- Type of boat I like: Wood boats .
- Location: Somewhere around Central Florida
- Contact:
Siting here just smiling at what DM said. I especially like the " I don't plan on changing the overall design of the Wadefish." ..( he is already thinking) ...jem wrote:augh...we shall see if this remains true. Little does he know, eh Chuck?dangermouse01 wrote:I will clarify one thing.
I don't plan on changing the overall design of the Wadefish 2.0.
Matt incorporated everything I wanted (an then some) into the 2.0 design.
DM
Any bets that during the building process you get two or three e-mails about the ... What ifs......
What if I do this or what if I do that.
Chuck.
Remember:
Amateurs built the Ark...... Professionals built the Titanic
Visit some fine paddlers at The Southern Paddler
Amateurs built the Ark...... Professionals built the Titanic
Visit some fine paddlers at The Southern Paddler
-
- Posts: 200
- Joined: Mon Jul 31, 2006 6:32 pm
- Type of boat I like: <-- Please read instructions to the left and delete this text. Then, tell us what type boat you like! :-)
- Location: Palm Bay, FL (east coast)
Matt has already gotten a few "what ifs?" and yeah he will probably get a few more. And yes, I have been already thinking, but I will save those for the Wadefish 2.0.2Oldsparkey wrote:
( he is already thinking) ...
Any bets that during the building process you get two or three e-mails about the ... What ifs......
What if I do this or what if I do that.
Chuck.
DM
-
- Design Reviewer
- Posts: 1186
- Joined: Sun Jun 20, 2004 8:03 pm
- Type of boat I like: <-- Please read instructions to the left and delete this text. Then, tell us what type boat you like! :-)
- Location: South-central Michigan
When the model number gets longer than the boat - that design is complete.dangermouse01 wrote:And yes, I have been already thinking, but I will save those for the Wadefish 2.0.2
Kayak Jack
Doing what you like is FREEDOM
Liking what you do is HAPPINESS
I spent most of my money on whiskey and women - and I'm afraid I just wasted the rest.
Doing what you like is FREEDOM
Liking what you do is HAPPINESS
I spent most of my money on whiskey and women - and I'm afraid I just wasted the rest.
-
- Posts: 200
- Joined: Mon Jul 31, 2006 6:32 pm
- Type of boat I like: <-- Please read instructions to the left and delete this text. Then, tell us what type boat you like! :-)
- Location: Palm Bay, FL (east coast)
Not much to report yet, been working on the cockpit frame.
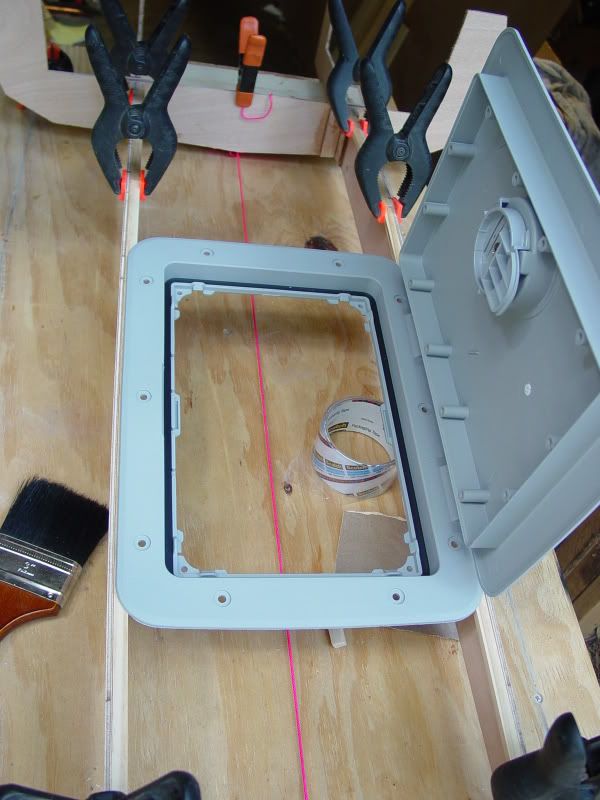
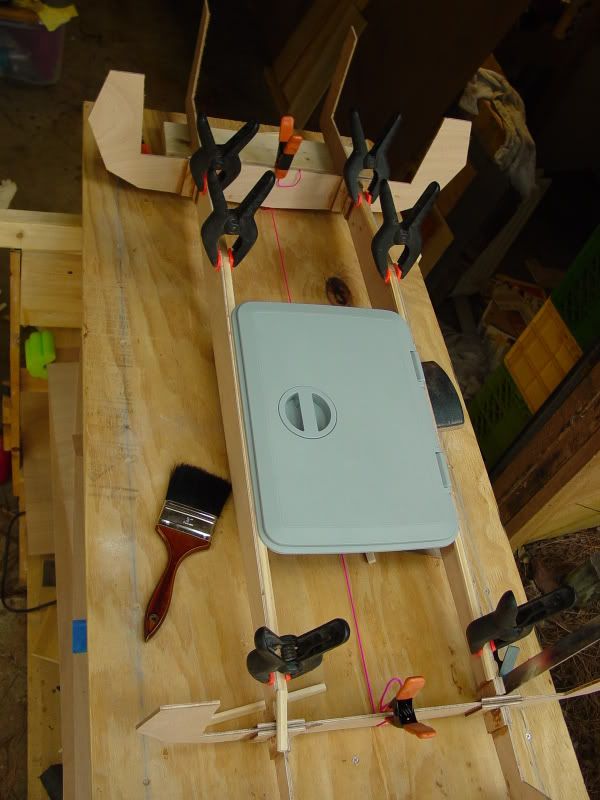
When I ordered the kit, I requested that the semi-circles not be cut into the longitudinal frames because I was planning on adding a sealed hatch like Mick did.
Today, did kinda a dry fit of the cockpit frame with the hatch.
The red (hot pink) string is the center of the hull. The is not much clearance between the hatch frame and the hull, about 2.5 inches at the front and just over 3.0 inches at the back. And that is at the center of the hull. Decided that just doesn't give me enough room to justify putting in a $40 hatch.
So I may just go ahead and cut the semi-circles in and forget about the sealed cockpit hatch altogether.
All for now..DM