Sabalo 12 my first kayak build
Re: Sabalo 12 my first kayak build
Catching up this post to at least the progress that's shown on my site build diary www.maximfx.com
Got all the panels stitched up. Somehow forgot to stitch in the bow jig which I had asked Matt about in the questions forum.
The bow wasn't the greatest, so I unstitched it and put the jig in. It helped the shape a bit, it still wasn't perfect but good enough for me.
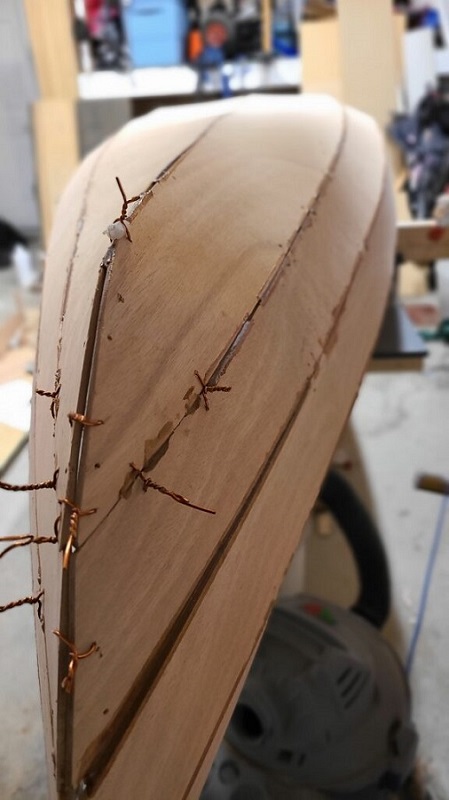
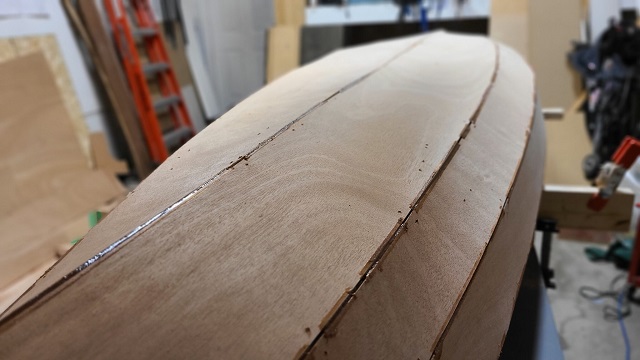
Got all the panels stitched up. Somehow forgot to stitch in the bow jig which I had asked Matt about in the questions forum.
The bow wasn't the greatest, so I unstitched it and put the jig in. It helped the shape a bit, it still wasn't perfect but good enough for me.


Re: Sabalo 12 my first kayak build
Next came sanding of the fillets down. Didn't realize how smooth everything was going to feel
I did 60 grit by hand as I wanted to work out the hull chines and was scared I was going to blow through the plywood veneer with a ROS
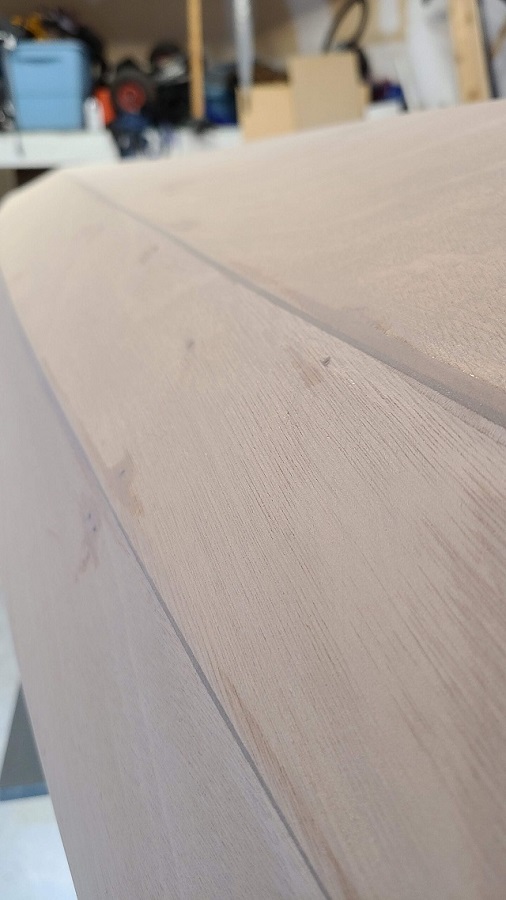
I did 60 grit by hand as I wanted to work out the hull chines and was scared I was going to blow through the plywood veneer with a ROS

Re: Sabalo 12 my first kayak build
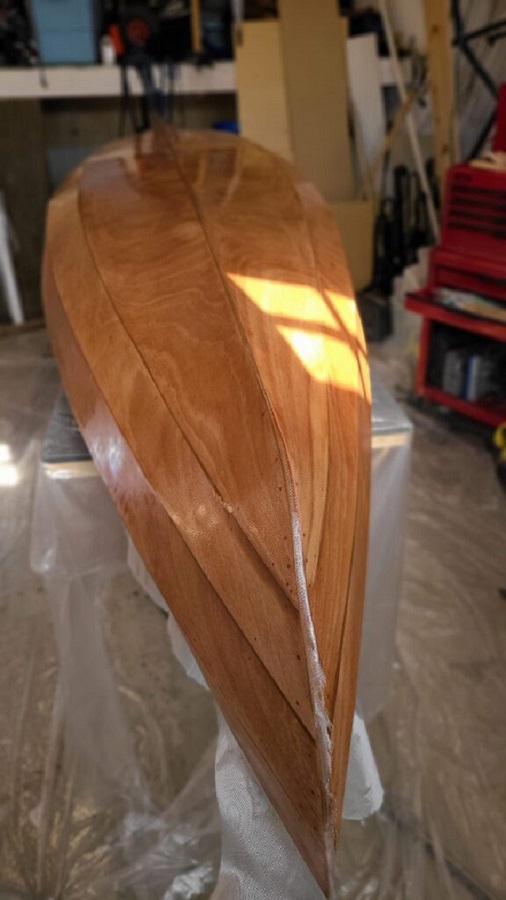
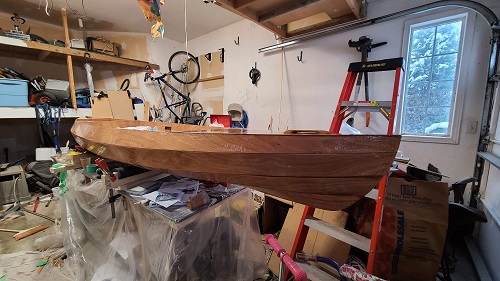
Fiberglass the hull. Watched so many videos on this. I gotta say this, its nowhere as easy as the videos look.
The way Panel A has an inverse incline when upside down means epoxy wants to drip off the edge of panel B. Seeing panel A clearly was a shore because it was in the shadow of my light. Also the kayak was way too close to the table and plastic sheets I used, so eventually the epoxy started sticking to the plastic which wasn't too bad, except than when I moved or accidently pulled on the plastic a bit the plastic would pull the fiberglass off the edge.
Saturating and the first fill coat went on fairly well. The 2nd fill coat are where things badly went wrong. Maybe I was a bit tired or too over confident, or switching to the roll on and tip with a brush method messed me up. But its extremely hard to distinguish fresh epoxy from hardened epoxy. The Raka I used is also very thin. I've since learned that you have to be very careful with it, even though it looks good when you walk away, 30 mins later it can develop runs. And runs I have! There must be a whole section I didn't tip off or applied way too much. Hull panels A/B are the worst.
Where its mostly flatter like panel D there are some beautiful sections. Hoping with a lot of sanding the whole thing comes out more like panel D!
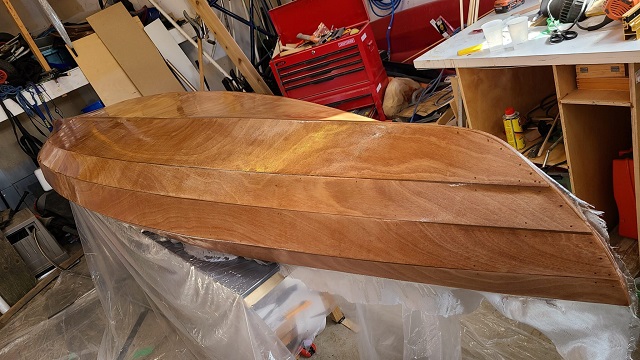


-
OnkaBob
- Posts: 401
- Joined: Fri Jul 18, 2008 10:12 am
- Type of boat I like: <-- Please read instructions to the left and delete this text. Then, tell us what type boat you like! :-)
- Location: Seaford, South Oz
Re: Sabalo 12 my first kayak build
There's a saying that experience is the thing you get just after you need it. I think that's one of the reasons why many people build a second boat.
Anyway, if it's any consolation, all the panels look good in the photos .
.
Anyway, if it's any consolation, all the panels look good in the photos
Cheers, Bob
Laker 13 - christened and slimed (just).
Laker accessories underway.
Laker 13 - christened and slimed (just).
Laker accessories underway.
Re: Sabalo 12 my first kayak build
Yeah, lots to learn to use on boat #2. Will probably go a lot faster too.
-
jem
- Site Admin
- Posts: 4916
- Joined: Fri Jun 18, 2004 8:14 pm
- Type of boat I like: Wooden
- Location: Greensboro, NC
- Contact:
Re: Sabalo 12 my first kayak build
All those little imperfections will become less noticeable once you get it in the water. She's looking good so far. 
-Matt. Designer.
Re: Sabalo 12 my first kayak build
Yes, for sure. Not too worried other than about how much sanding will be required.
Thanks for an awesome design. Even with the slight modifications everything is coming together nicely.
Thanks for an awesome design. Even with the slight modifications everything is coming together nicely.
Re: Sabalo 12 my first kayak build
So I got really lazy with both updating this post and working on the kayak.
But I'm done. So this will be like a time lapse of progress.
I'm not the best at documenting my work anyways.
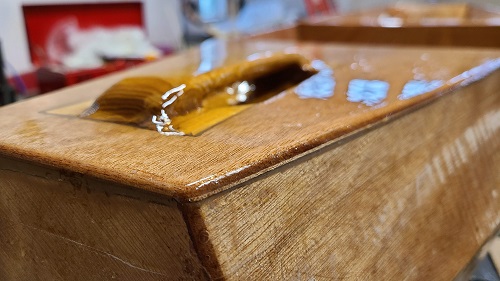
Custom recessed handle installed. I didn't want a plastic handle so I made these. They're not that heavy. It starts as a solid Cedar block and has a recessed area so that it doesn't stick out too much. Think it looks great.
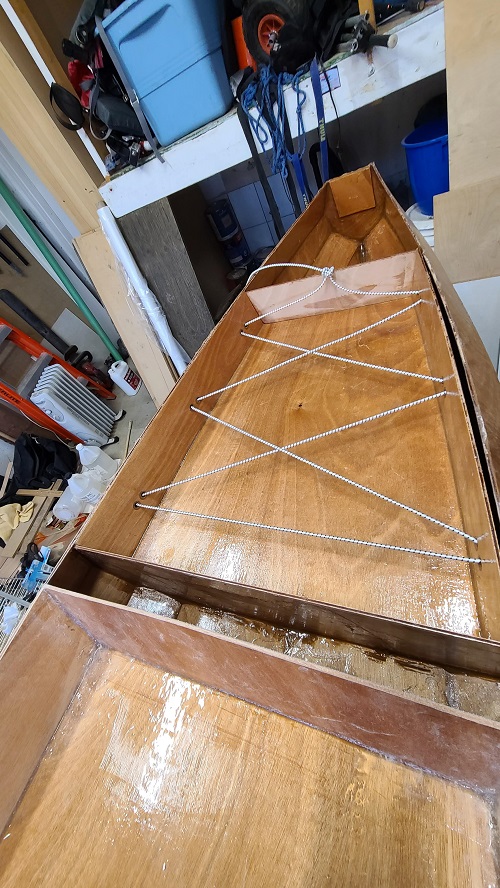
Getting ready to seal up the kayak. Testing fit, maroske fittings
But I'm done. So this will be like a time lapse of progress.
I'm not the best at documenting my work anyways.

Custom recessed handle installed. I didn't want a plastic handle so I made these. They're not that heavy. It starts as a solid Cedar block and has a recessed area so that it doesn't stick out too much. Think it looks great.

Getting ready to seal up the kayak. Testing fit, maroske fittings
Re: Sabalo 12 my first kayak build
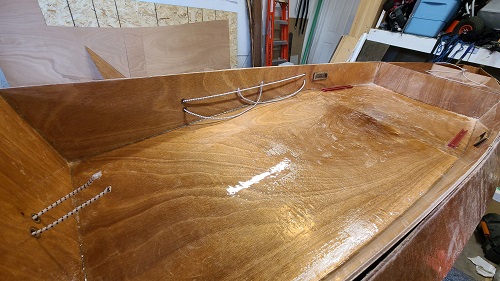
Cockpit area with fittings in for testing.
Kayak Sealed up
Funny thing is, now that I've finished sanding, man there's so many drips that had to be sanded out!