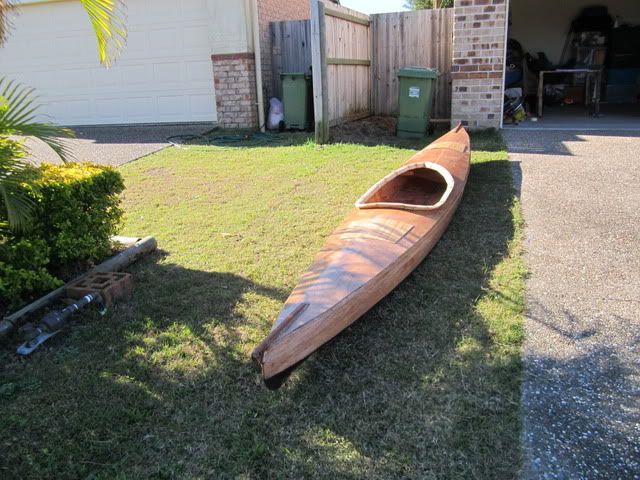
Not really a builder log, more of an update on a five year long saga.
Bout a coupla weeks to go. some details in questions and comments "lack of active posts" More to follow.
Cheers John.
Five years on
-
- Posts: 192
- Joined: Mon Nov 12, 2007 8:12 am
- Type of boat I like: <-- Please read instructions to the left and delete this text. Then, tell us what type boat you like! :-)
- Location: S.E. Queensland
-
- Site Admin
- Posts: 4916
- Joined: Fri Jun 18, 2004 8:14 pm
- Type of boat I like: Wooden
- Location: Greensboro, NC
- Contact:
Re: Five years on
That's the "original" Okwata with rounded deck. I may need to revisit the design and publish.
-Matt. Designer.
-
- Posts: 141
- Joined: Fri Feb 25, 2011 4:26 am
- Type of boat I like: Kayaks and canoes
- Location: Fraser Coast, Queensland, Australia
Re: Five years on
Dam straight!jem wrote:That's the "original" Okwata with rounded deck. I may need to revisit the design and publish.
I also have the plans for the original Occy.
John, your boat is magnificent mate. Bloody well done!
Re: Five years on
John, excellent craftsmanship on the Occy. Very elegant and beautiful boat. Please give us a detailed report when you get her wet.
Phishtech
Phishtech
-
- Posts: 192
- Joined: Mon Nov 12, 2007 8:12 am
- Type of boat I like: <-- Please read instructions to the left and delete this text. Then, tell us what type boat you like! :-)
- Location: S.E. Queensland
Re: Five years on
Whilst its nice to be praised, and I do appreciate the gesture, craftmanship is probably a bit of an overstatement. I'm a bit of a hacker I'm afraid and you won't get any closeups of my builds, particularly as they're in progress. My sole intention is to end up with a serviceable kayak that pleases me. A few examples:
How many of you real builders use tinsnips to trim parts from ply?
Anyone else use a 4" angle grinder?
My fillets along the centre seam were actually and literally pours. Just poured it in and tipped it back and forth till it was level (ish)
I drew the hull panels and frames as per the plans, cable tied it all together. Marked it with a texta how I wanted it to be. Then cut off one and a half to two inches off everything except in the overall lengths of panels by eye, and didn't look at the plans again. ****In fact, apart from the locations of the hatches I didn't even use a tape measure again! I just bodgie my way along. This probably takes twice as long as a build needs to take because I'll spend as much time taking stuff off as I take putting stuff on. If I don't like the look of what I've done I change it as I go along. I wanted a higher deck in front than the plans, which had them both at the same height. I wanted the whole thing lower in the water by two inches. I wanted rocker, quite a bit. I wanted more vee. I used shop bought moulding for sheer clamps and coaming. I guess I like to "cheat". NO one will ever have a boat that is just like mine.
Example, where I used quad moulding for sheer clamps ( which I believe is worth consideration for anyone) I was able to plane away a nice angle where the deck meets the sides. Rather than have that sharp angle that is easily damaged. Thought I was real smart. It looked crap*** when I added resin! Because of the variation in the middle ply which I had exposed on both pieces, light, dark, light dark. Tonight I found a solution and can fix it up pretty. A $5 bamboo floor mat which I stripped down to make lightweight hatches is also a perfect fit over the angle. Apart from the cover up it will be a sacrificial and quite hard wearing strip that happens to be a nice contrast with wood either side of it. (whew)
I make a lot of work for myself doing stuff. I suppose the alternative would be to take up watching tv and that's not gonna happen.
Again I appreciate the praise but craftmanship its not
Cheers John.
Ps *** You can see what I mean on the bottom pic. You can also see the bamboo stuff as a hatch cover on the deck. The strips fit very nicely along there.
Pps ****
No disrespect to Matt, but I believe this boat was a poor seller because of the blandness of the deck's profile. The hull profile as viewed from the side was awesome though, just a little high for a lightweight paddler. Pics middle of this page at sparkey's.
http://www.southernpaddler.com/phpBB3/v ... 9&start=30
cheers John.
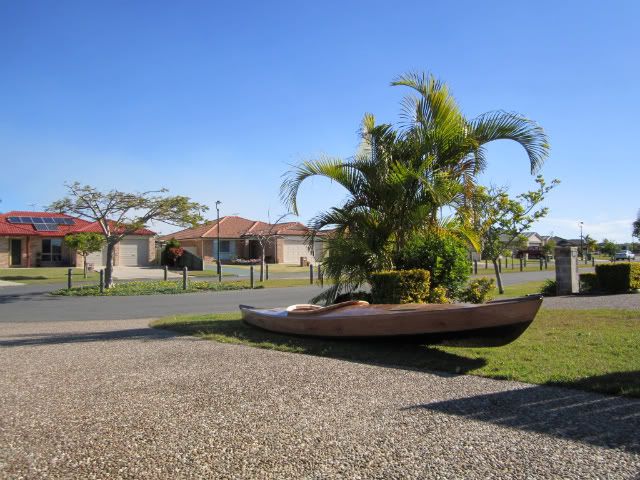
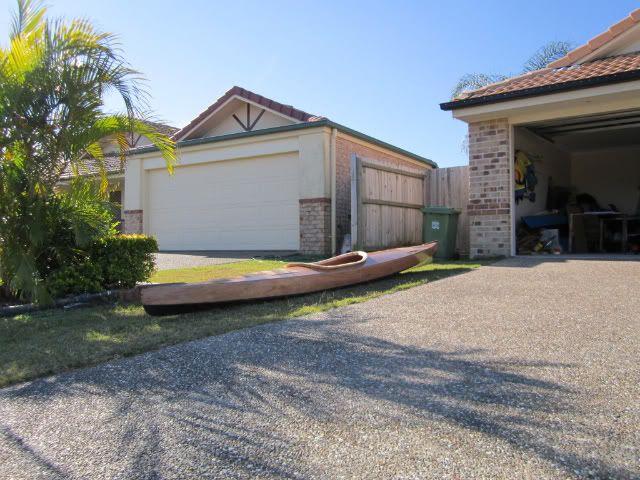
-
- Posts: 374
- Joined: Wed Mar 30, 2011 7:20 am
- Type of boat I like: Fishing SOTs.
- Location: Adelaide, South Australia.
Re: Five years on
Hey, to make all those adjustments you have to know something about how to build a boat like that. I wouldn't dare make any substantial changes unless I have a bit of experience under my belt, other than external fittings etc.
Custom designing without plans.... that's craftsmanship in my book!
My psychologist reckons I need lots of fishin' therapy!
-
- Posts: 192
- Joined: Mon Nov 12, 2007 8:12 am
- Type of boat I like: <-- Please read instructions to the left and delete this text. Then, tell us what type boat you like! :-)
- Location: S.E. Queensland
Re: Five years on
Nah its just like driving in scarey traffic. close yer eyes it'll all work out.
-
- Posts: 374
- Joined: Wed Mar 30, 2011 7:20 am
- Type of boat I like: Fishing SOTs.
- Location: Adelaide, South Australia.
Re: Five years on
Okayyy..... now I'm not so sure.... close your eyes in scary traffic.... mmm...
My psychologist reckons I need lots of fishin' therapy!