Hi john,
The rockers an illusion John. It aint no banana boat.
Cheers
Roger
Okwata 15-26LC Rogers Occy
-
rodot
- Posts: 205
- Joined: Tue Jan 05, 2010 8:56 pm
- Type of boat I like: Okwata kayak
- Location: South Coast NSW Australia
Re: Okwata 15-26LC Rogers Occy
Okwata LC,
Northwind,
Quetico
Northwind,
Quetico
-
rodot
- Posts: 205
- Joined: Tue Jan 05, 2010 8:56 pm
- Type of boat I like: Okwata kayak
- Location: South Coast NSW Australia
Re: Okwata 15-26LC Rogers Occy
Gave the hull a saturation coat of epoxy and sanded nice and smooth. This ply seemed very thirsty. Then I draped the fiberglass cloth over the hull and wetted it out with a plastic scraper, and finished off with a squeegee.
After four coats of epoxy, sanding between coats, I reckon it's pretty good for a first timer.
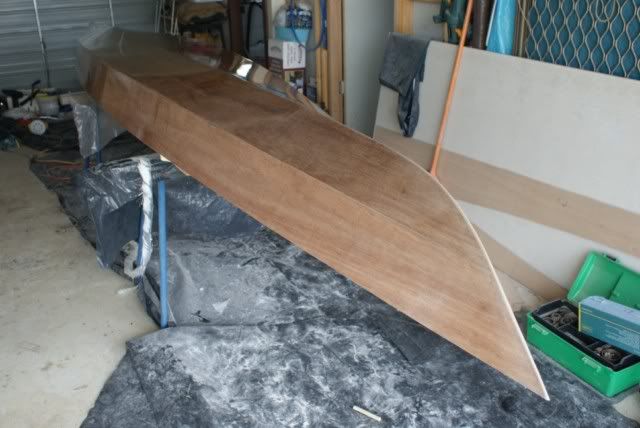
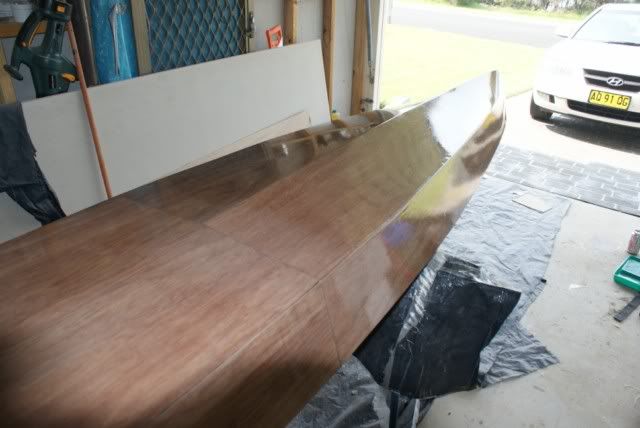
After four coats of epoxy, sanding between coats, I reckon it's pretty good for a first timer.


Okwata LC,
Northwind,
Quetico
Northwind,
Quetico
-
hairymick
- Design Reviewer
- Posts: 1965
- Joined: Wed Jan 04, 2006 8:54 am
- Type of boat I like: <-- Please read instructions to the left and delete this text. Then, tell us what type boat you like! :-)
- Location: Queensland, Australia
- Contact:
Re: Okwata 15-26LC Rogers Occy
Mate, that has to be the understatement of the year!I reckon it's pretty good for a first timer
your build so far is bloody remarkable! i would use sensational only john beat me to it.
keep doing what ever it is that you are doing mate.
respectfully,
Mick
-
john the pom
- Posts: 192
- Joined: Mon Nov 12, 2007 8:12 am
- Type of boat I like: <-- Please read instructions to the left and delete this text. Then, tell us what type boat you like! :-)
- Location: S.E. Queensland
Re: Okwata 15-26LC Rogers Occy
Roger Just been looking over your build log again and noticed that when you fixed up those panels you used a ply splice. I could be wrong but in a pic posted on the 9th March it looks as though the splice goes right to the hull/side join. You might well have discovered and sorted this out by now. Otherwise, how do you plan to seal the seam? Might not matter or it could pay to trim a bit off the bottom edge of the splice.
Regards John.
Regards John.
-
rodot
- Posts: 205
- Joined: Tue Jan 05, 2010 8:56 pm
- Type of boat I like: Okwata kayak
- Location: South Coast NSW Australia
Re: Okwata 15-26LC Rogers Occy
Hi John,
I've been called away for a couple of weeks, so I haven't done any further work on the boat. Back to the build next week.
The bottom of the ply plate was chamfered to an acute angle and I cant forsee a problem in running a bead of thickened epoxy along it and then fiberglass over it. The butt plate may mean that I will have to lay the fibreglass in two sections with an overlap, but I can't think of any great dramas ahead. If there is something that I am overlooking though, please let me know.
I believe that the help and advice given in this forum is fantastic. It is great that people can share thier knowledge and experience and we are all the better for it. This has got to be using the internet to its greatest potential.
Cheers
Roger
Okwata LC,
Northwind,
Quetico
Northwind,
Quetico
-
rodot
- Posts: 205
- Joined: Tue Jan 05, 2010 8:56 pm
- Type of boat I like: Okwata kayak
- Location: South Coast NSW Australia
Re: Okwata 15-26LC Rogers Occy
Back to the build.
Refitted the frames and held them in place with duct tape.
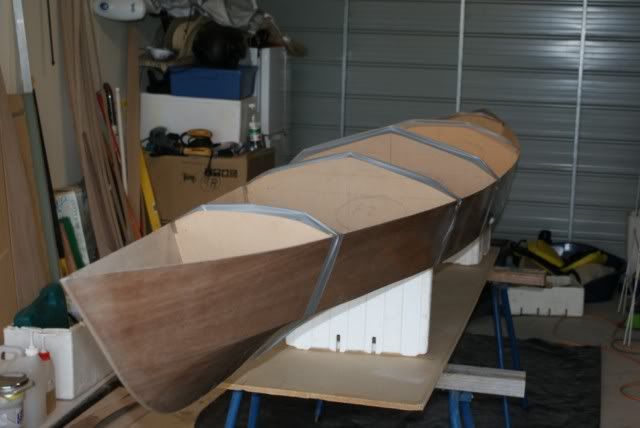
Then stitched all the deck panels together. It needed just a little trimming of a couple of panels for everything to fall in place with no ugly gaps, but overall it was too easy. Tack welded everything in place.
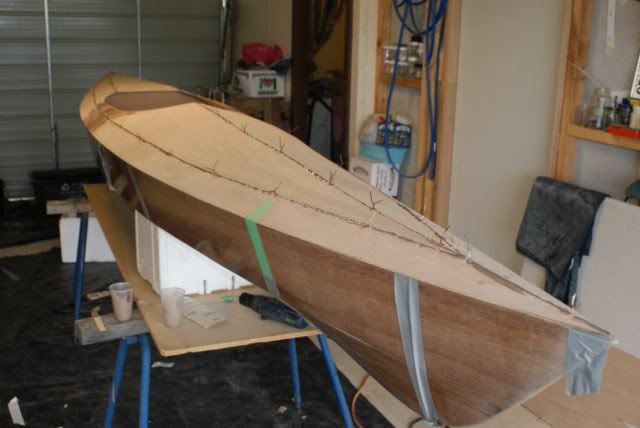
I wish I had of cleaned up the runs before the glue dried. It took a lot of scraping but eventually it looked pretty good. Next time I'll use masking tape.
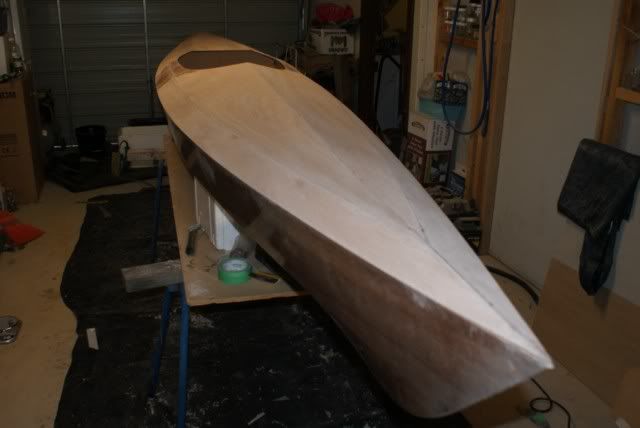
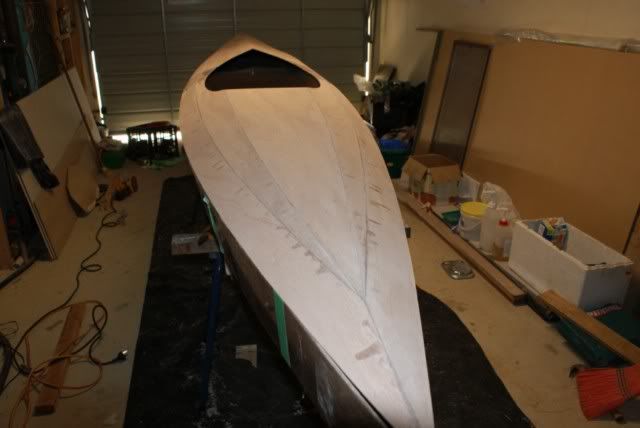
I can see I'm gonna have to clean up my mess in the shed soon.
I can't wait to get it on the water, but he grandkids are coming down for easter so I guess not a lot will be done on the boat for the next few days.
Cheers
Roger
Refitted the frames and held them in place with duct tape.

Then stitched all the deck panels together. It needed just a little trimming of a couple of panels for everything to fall in place with no ugly gaps, but overall it was too easy. Tack welded everything in place.

I wish I had of cleaned up the runs before the glue dried. It took a lot of scraping but eventually it looked pretty good. Next time I'll use masking tape.


I can see I'm gonna have to clean up my mess in the shed soon.
I can't wait to get it on the water, but he grandkids are coming down for easter so I guess not a lot will be done on the boat for the next few days.
Cheers
Roger
Okwata LC,
Northwind,
Quetico
Northwind,
Quetico
-
OnkaBob
- Posts: 401
- Joined: Fri Jul 18, 2008 10:12 am
- Type of boat I like: <-- Please read instructions to the left and delete this text. Then, tell us what type boat you like! :-)
- Location: Seaford, South Oz
Re: Okwata 15-26LC Rogers Occy
Roger if you look at some of the other build logs here you will learn that many consider a messy work area a responsibility not a right - and let's face it yours is way too clean. I'm coming round to sprinkle a bag of sawdust over everything so we can all relate more to this buildrodot wrote:I can see I'm gonna have to clean up my mess in the shed soon.
Must say the boats going together very nicely - lines look good and joints are neat
Cheers, Bob
Laker 13 - christened and slimed (just).
Laker accessories underway.
Laker 13 - christened and slimed (just).
Laker accessories underway.
-
john the pom
- Posts: 192
- Joined: Mon Nov 12, 2007 8:12 am
- Type of boat I like: <-- Please read instructions to the left and delete this text. Then, tell us what type boat you like! :-)
- Location: S.E. Queensland
Re: Okwata 15-26LC Rogers Occy
Have already made the decision that the next (can't be far away now) boat is gonna have ALL panel faces that will eventually be on show with at least one saturation coat on. BEFORE even mixing any woodflour glue including before panel splices. That is to say as soon as I'm happy that they've been cut accurately. Just makes the hard stainy stuff so much easier to wipe off and control. I know its probly not technically correct to use epoxy other than within a particular time frame, but I would key it before adding further coats.I wish I had of cleaned up the runs before the glue dried. It took a lot of scraping but eventually it looked pretty good. Next time I'll use masking tape.
Cheers John.
-
rodot
- Posts: 205
- Joined: Tue Jan 05, 2010 8:56 pm
- Type of boat I like: Okwata kayak
- Location: South Coast NSW Australia
Re: Okwata 15-26LC Rogers Occy
The build continues without drama.
I made sure that I masked the jionts before I filleted them with a thickened epoxy mix.
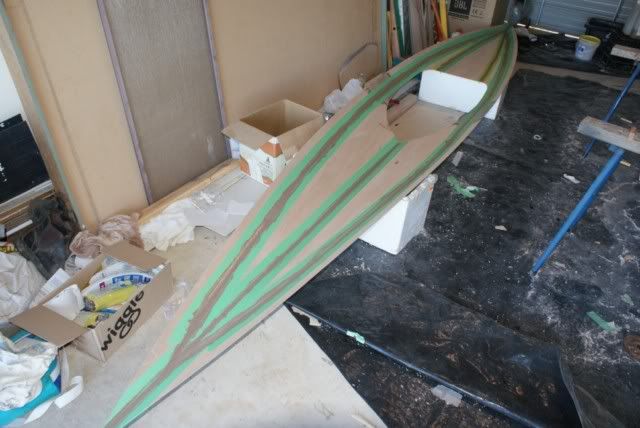
Then rolled on a saturation coat of epoxy.
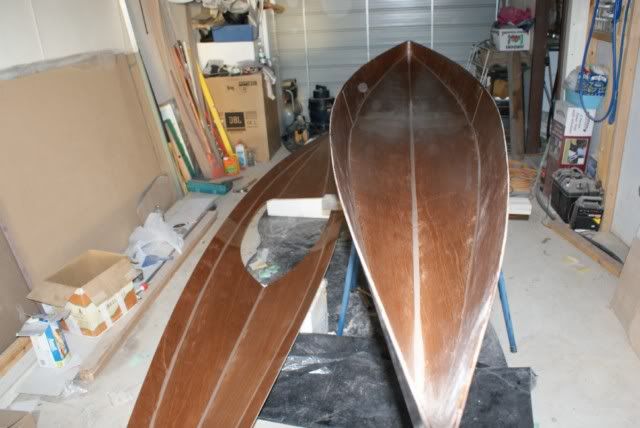
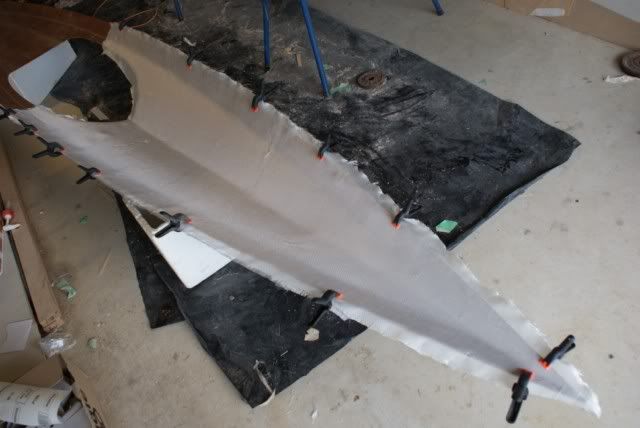
I fiberglassed the underside of the deck in two sections in order to save a bit of fiberglass cloth by using the pointy bit of cloth left over from the first one.
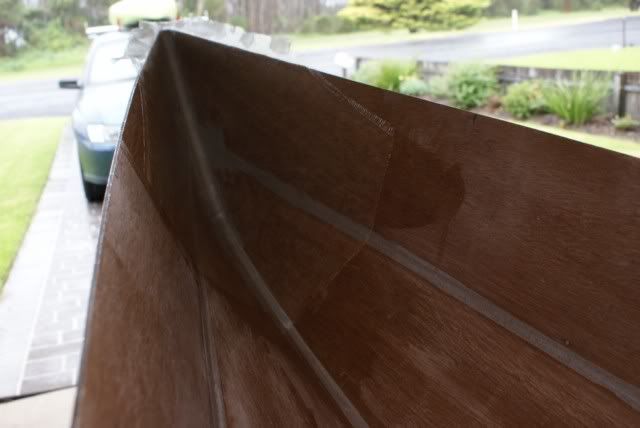
Then I fiberglassed the ends of the inside of the hull with cloth cut on a bias. It is amazing how it will conform with the shape of the hull.
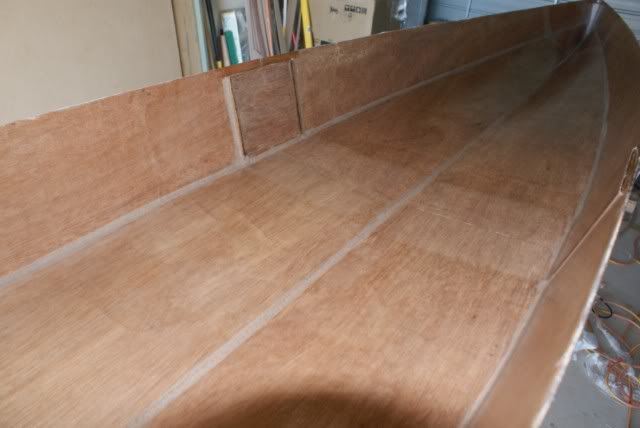
The rest of the hull was fiberglassed in one length with much trepidation, but I was suprised that it all went down really well. No wrinkles and only a couple of very minor runs which were easy to remove.
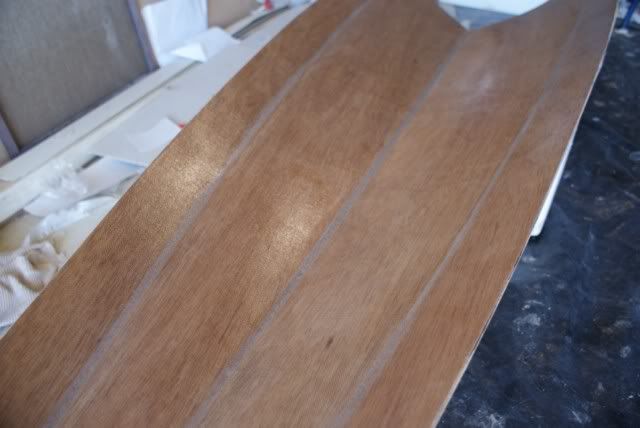
I have since done the end pours and a coat of epoxy and now I just have to fit the shear clamps and the mounts for the footpegs.
In order to mark out where to place the foot rests, I guess I'll have to sit in the hull to ascertain the right position. A question I have, without stating the obvious, is where do I place my bum? Should I just sit in a position where my back is about 3 or 4 inches in front of the back of the cockpit cutout in the deck and stretch my legs?
Cheers
Roger
I made sure that I masked the jionts before I filleted them with a thickened epoxy mix.

Then rolled on a saturation coat of epoxy.

I fiberglassed the underside of the deck in two sections in order to save a bit of fiberglass cloth by using the pointy bit of cloth left over from the first one.

Then I fiberglassed the ends of the inside of the hull with cloth cut on a bias. It is amazing how it will conform with the shape of the hull.

The rest of the hull was fiberglassed in one length with much trepidation, but I was suprised that it all went down really well. No wrinkles and only a couple of very minor runs which were easy to remove.


I have since done the end pours and a coat of epoxy and now I just have to fit the shear clamps and the mounts for the footpegs.
In order to mark out where to place the foot rests, I guess I'll have to sit in the hull to ascertain the right position. A question I have, without stating the obvious, is where do I place my bum? Should I just sit in a position where my back is about 3 or 4 inches in front of the back of the cockpit cutout in the deck and stretch my legs?
Cheers
Roger
Okwata LC,
Northwind,
Quetico
Northwind,
Quetico