Thanks for the comments, guys. Getting this close to the finish, it gets harder to spend the time on the niggly little things to get it right.
Bruce
Laker for a first timer
-
Bruce36549
- Posts: 70
- Joined: Sun Dec 07, 2008 11:01 pm
- Type of boat I like: <-- Please read instructions to the left and delete this text. Then, tell us what type boat you like! :-)
- Location: Lower Alabama USA on Perdido Bay
Re: Laker for a first timer
I may look busy, but I'm only confused.
-
Bruce36549
- Posts: 70
- Joined: Sun Dec 07, 2008 11:01 pm
- Type of boat I like: <-- Please read instructions to the left and delete this text. Then, tell us what type boat you like! :-)
- Location: Lower Alabama USA on Perdido Bay
Re: Laker for a first timer
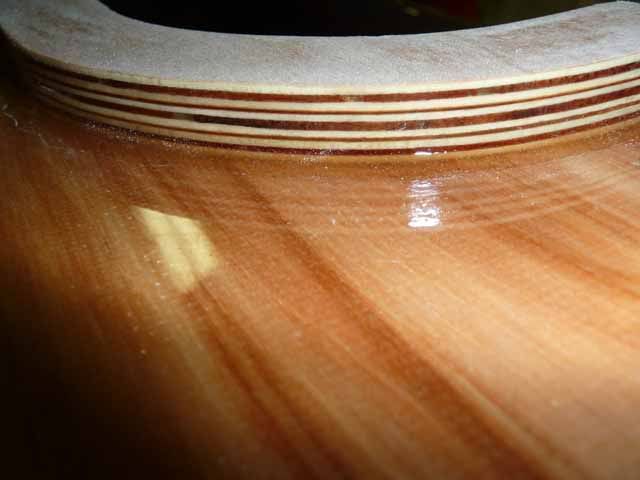
Been working on getting the coaming finished:
Wanted to finish the outside of the coaming before putting the wider piece on top to get it done neater. Put a small fillet at the deck joint, and painted three coats of resin on the outside. I just didn't want to fight trying to get a brush up underneath the overhang of the cap piece.
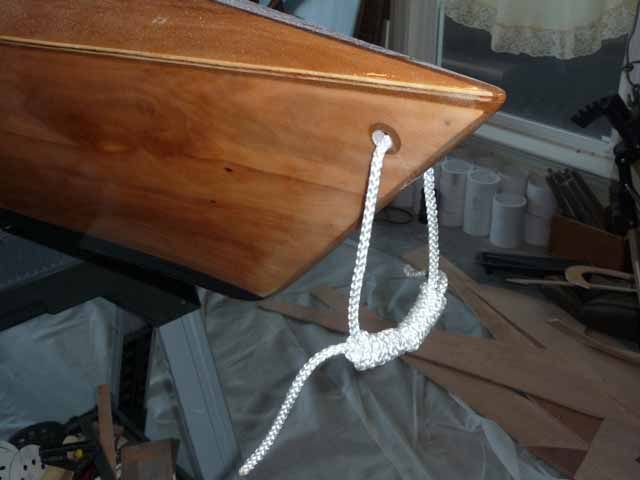
Also took the time to drill holes front and back for carry handles. Left a little excess rope till after launch to make it easier to make the loop shorter if it hangs down too far.
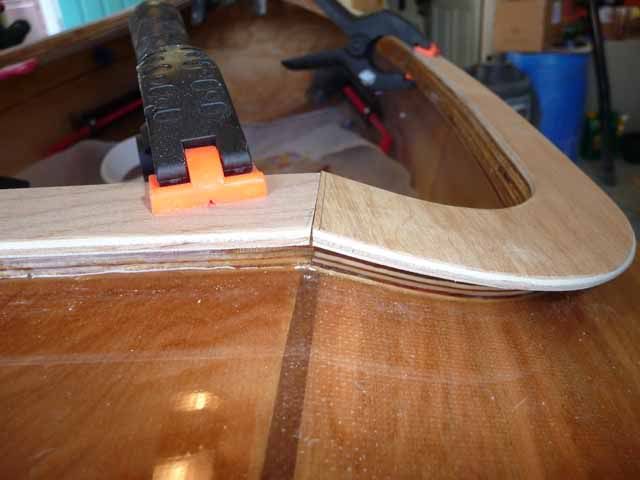
On to the coaming cap. Fitted the pieces and marked each end for cutting:
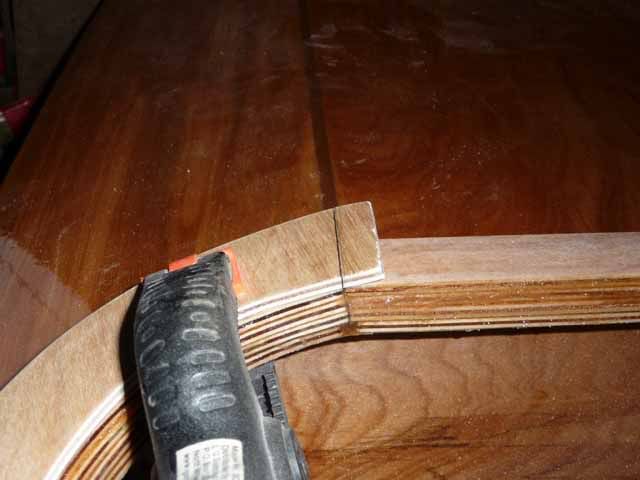
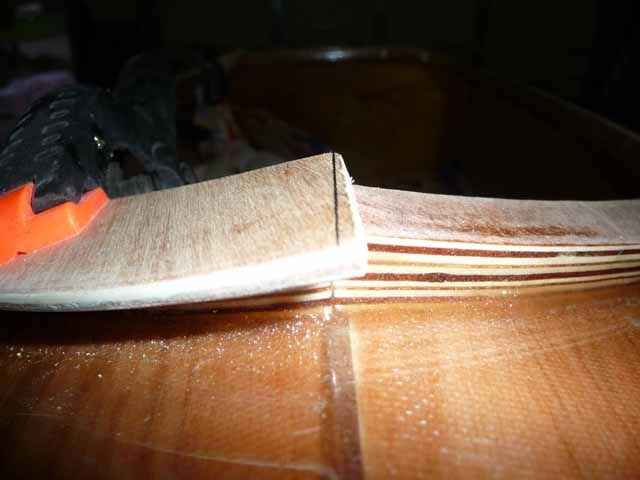
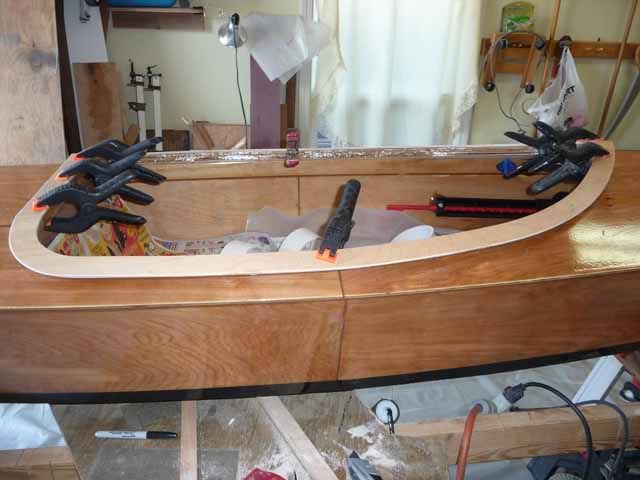
Then dry fitted the entire assemblage to make sure it was right:
Wanted to finish the outside of the coaming before putting the wider piece on top to get it done neater. Put a small fillet at the deck joint, and painted three coats of resin on the outside. I just didn't want to fight trying to get a brush up underneath the overhang of the cap piece.

Also took the time to drill holes front and back for carry handles. Left a little excess rope till after launch to make it easier to make the loop shorter if it hangs down too far.

On to the coaming cap. Fitted the pieces and marked each end for cutting:


Then dry fitted the entire assemblage to make sure it was right:


I may look busy, but I'm only confused.
-
Bruce36549
- Posts: 70
- Joined: Sun Dec 07, 2008 11:01 pm
- Type of boat I like: <-- Please read instructions to the left and delete this text. Then, tell us what type boat you like! :-)
- Location: Lower Alabama USA on Perdido Bay
Re: Laker for a first timer
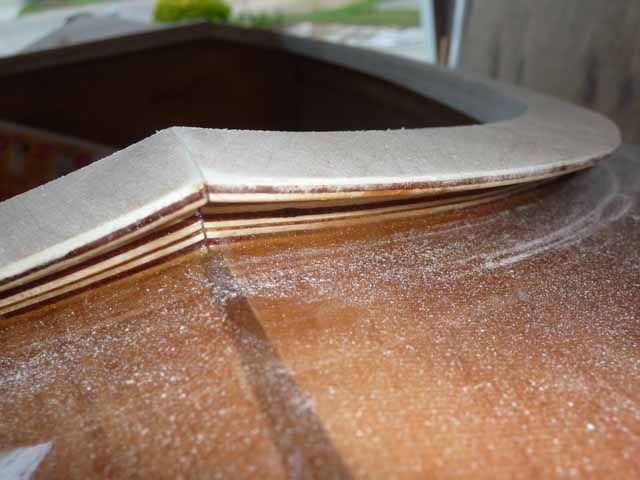
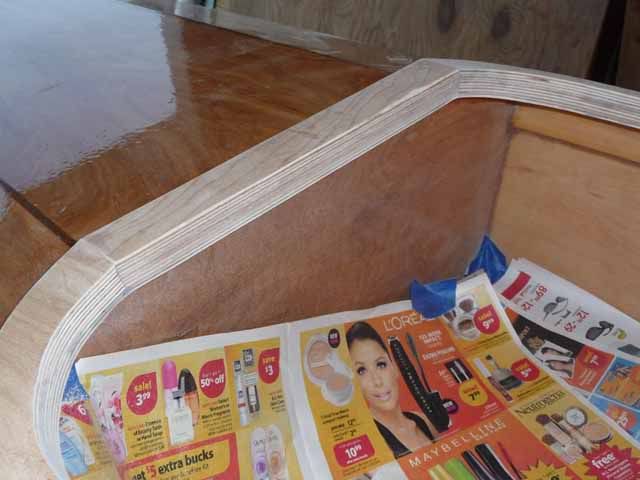
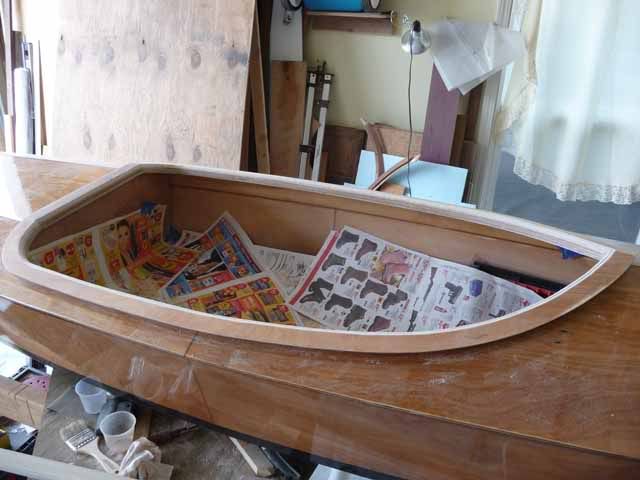
Got the coaming cap piece glued down and final sanding done:
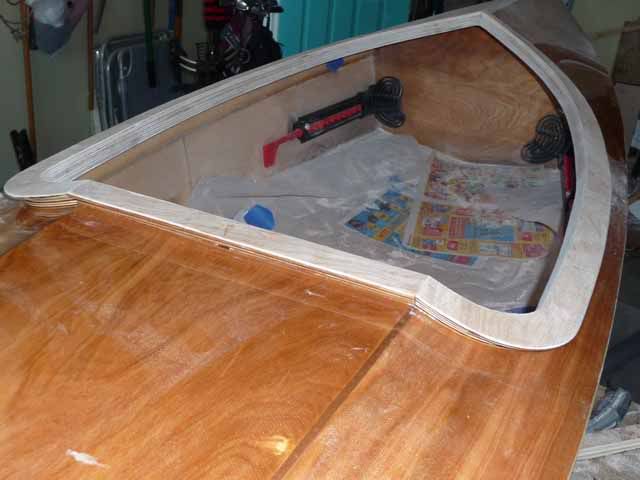
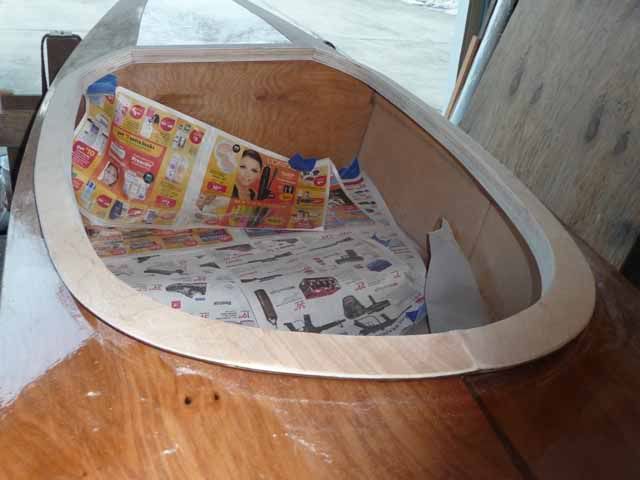
Bruce


Bruce
I may look busy, but I'm only confused.
-
Bruce36549
- Posts: 70
- Joined: Sun Dec 07, 2008 11:01 pm
- Type of boat I like: <-- Please read instructions to the left and delete this text. Then, tell us what type boat you like! :-)
- Location: Lower Alabama USA on Perdido Bay
Re: Laker for a first timer
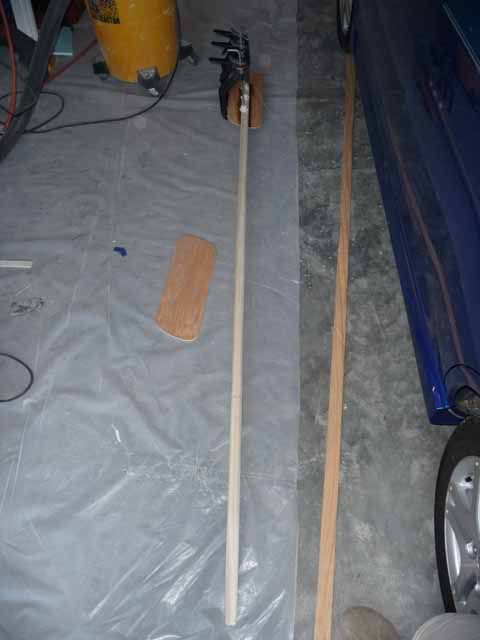
Meanwhile, I started making a paddle. It's getting too close to launch date to get fancy, and I didn't want to buy a commercially made "plastic" one so I followed a design that I had seen at the Wood Boat Festival in Josephine last month. Two 3/4 X 2 inch pieces of poplar laminated then milled to 1 1/4 inches square. Cut a curve in the last 12 inches of each end with my band saw, then rounded off the edges of the shaft with a 3/4 inch roundover on the router table. Finally tapered and shaped the back side of the last 12 inches on each end with a hand plane and sanded the entire shebang. The paddles are made of left over 1/4 inch plywood from the boat and are designed to supposedly drip water off the lower corner before it starts to run down the shaft. We'll see. I'll just brush on 3 coats of resin to finish it up. Cheap, easy, fast and should work as good as anything else.
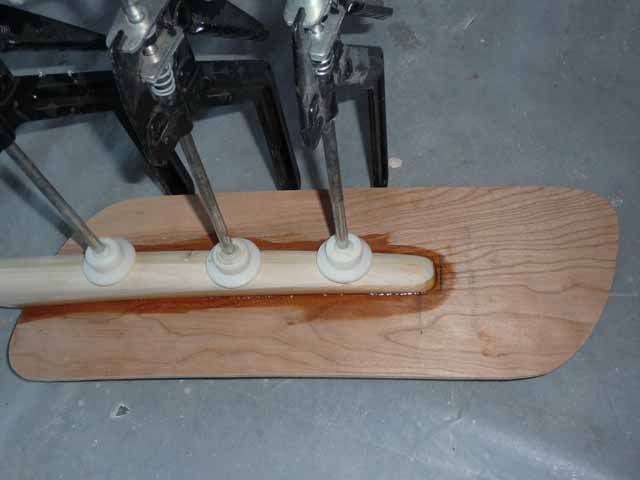
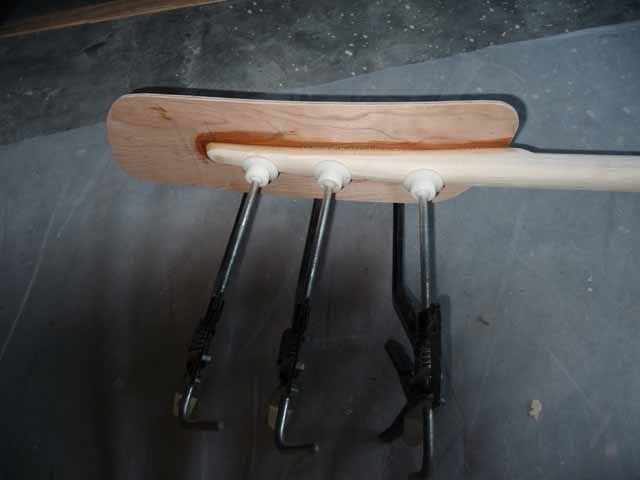
I didn't have enough clamps deep enough to reach to the middle of the paddles to do both ends at the same time:
Bruce


I didn't have enough clamps deep enough to reach to the middle of the paddles to do both ends at the same time:

Bruce
I may look busy, but I'm only confused.
-
hairymick
- Design Reviewer
- Posts: 1965
- Joined: Wed Jan 04, 2006 8:54 am
- Type of boat I like: <-- Please read instructions to the left and delete this text. Then, tell us what type boat you like! :-)
- Location: Queensland, Australia
- Contact:
Re: Laker for a first timer
geez Bruce,
You do nice work mate.
Ya gonna LOVE this boat.
You do nice work mate.
Ya gonna LOVE this boat.
Regards,
Mick
JEMWATERCRAFT Swampgirl; Wadefish;Touring Pirogue;South Wind; P5 ;
Laker X 2, Sasquatch 16.5 T-V 15 Okwata 15:
Cobia 15 (under construction)
Mick
JEMWATERCRAFT Swampgirl; Wadefish;Touring Pirogue;South Wind; P5 ;
Laker X 2, Sasquatch 16.5 T-V 15 Okwata 15:
Cobia 15 (under construction)
-
OnkaBob
- Posts: 401
- Joined: Fri Jul 18, 2008 10:12 am
- Type of boat I like: <-- Please read instructions to the left and delete this text. Then, tell us what type boat you like! :-)
- Location: Seaford, South Oz
Re: Laker for a first timer
Looking betterer and betterer all the time Bruce! That wood grain is even more impressive up close too.
I like your "Cheap, easy,fast" paddle - it puts my "quick n dirty" one to shame ! I hollowed out the shaft on mine to reduce weight but I imagine that poplar would be almost as light because I used a denser hardwood (had to take what was available). When you've finished can you let us know the all up weight please? I've nearly finished a second paddle of my own design but am thinking of copying yours as another project, it looks that good
  .
.
I like your "Cheap, easy,fast" paddle - it puts my "quick n dirty" one to shame
Cheers, Bob
Laker 13 - christened and slimed (just).
Laker accessories underway.
Laker 13 - christened and slimed (just).
Laker accessories underway.
-
Bruce36549
- Posts: 70
- Joined: Sun Dec 07, 2008 11:01 pm
- Type of boat I like: <-- Please read instructions to the left and delete this text. Then, tell us what type boat you like! :-)
- Location: Lower Alabama USA on Perdido Bay
Re: Laker for a first timer
Mick, thanks for the comment. Means a lot coming from you. I'm pleased with the way it is finishing up. There are some bad spots that I will always see, but for my first effort it has come along very nicely. I told my wife that this one is hers, and I will use the Okwata that I am doing next, so it's good enough for who it's for.
Bob, I looked at several sites on the internet on paddle building. Guess if I had spent more time working on it and less time reading about it I could have made something a little "prettier". (I have too many projects and not enough time.) The shaft on this one may be a little large in diameter, especially if my wife uses it, but it will take using if for a bit to see what mods I would make on the next one. I had thought of using 1/4 inch laminations and drilling holes in the internal lams it lighten it up some. Also had thought about doing the blades by building up several layers of fiberglass, but I don't know how the weight would balance out compared to the plywood. This one took something like 4 to 6 hours to get to this point from a rough cut 10 inch wide 1 inch thick poplar board. Glad you like it. I will be posting weights on it all when everything is finished. The Laker will probably be heavier than average. I think I got carried away with the resin. I had all I could do to get the glass to stay flat and get all the bubbles out of it without worrying about how much resin I was using.
Bruce
I may look busy, but I'm only confused.
-
OnkaBob
- Posts: 401
- Joined: Fri Jul 18, 2008 10:12 am
- Type of boat I like: <-- Please read instructions to the left and delete this text. Then, tell us what type boat you like! :-)
- Location: Seaford, South Oz
Re: Laker for a first timer
Hhhmmmm.....I wonder if that's ever happened to anyone else.......Bruce36549 wrote:I had all I could do to get the glass to stay flat and get all the bubbles out of it without worrying about how much resin I was using. Bruce
A few details of my paddle shaft in case you're interested:
There are 2 things that are difficult when gluing hollowed quad:
- making sure the edges line up. You can't use too many cable ties - I spaced mine at about 1 - 2 inches and just got an OK result. I think just under 1" would be ideal. The first one I did needed a lot of sanding and is really out of round because I used tape instead of ties - just could not get enough control.
- setting up the epoxy coated pieces into a circle is difficult, They tend to collapse because being hollowed out they only touch at the edges. A dry run is essential to get the technique right.


Cheers, Bob
Laker 13 - christened and slimed (just).
Laker accessories underway.
Laker 13 - christened and slimed (just).
Laker accessories underway.
-
Bruce36549
- Posts: 70
- Joined: Sun Dec 07, 2008 11:01 pm
- Type of boat I like: <-- Please read instructions to the left and delete this text. Then, tell us what type boat you like! :-)
- Location: Lower Alabama USA on Perdido Bay
Re: Laker for a first timer
Bob, I have never seen it done like that. Very impressive that you were able to keep every thing under control during glue up. You must have had three pairs of hands. I have seen flat boards with beveled edges glued together to make a square or octagonal shape, but it seems like a very difficult prospect to do it with curved sections. Usually the prepared boards are laid down edge to edge on some tape strips that have been placed crosswise with sticky side up, then the tape ends are picked up bringing the boards into shape while the tape keeps them together and act as clamps. Even this seems like it would be cumbersome with something as long as a paddle. There is also something called a "birdsmouth" technique that entails preparing one edge of each board in a way that keeps everything in alignment when you glue it up. It is beyond my ability to explain in words, but I am sure that you could google it.
Keep up the good work.
Bruce
Keep up the good work.
Bruce
I may look busy, but I'm only confused.
-
Bruce36549
- Posts: 70
- Joined: Sun Dec 07, 2008 11:01 pm
- Type of boat I like: <-- Please read instructions to the left and delete this text. Then, tell us what type boat you like! :-)
- Location: Lower Alabama USA on Perdido Bay
Re: Laker for a first timer
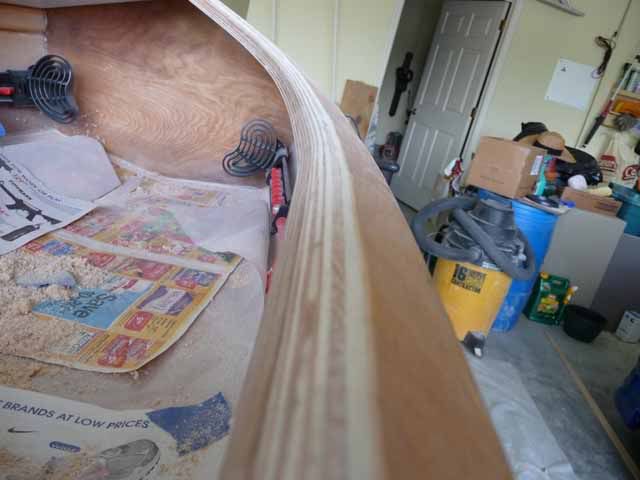
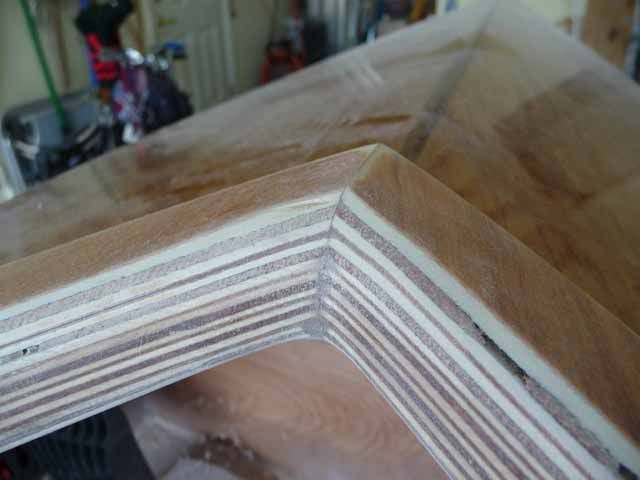
Wanted to round over the top edge of the coaming, so I experimented with some scrap and decided that I liked the appearance that a 3/4 inch roundover gave me. I expect it will be more comfortable for resting my arms, and I like the look.
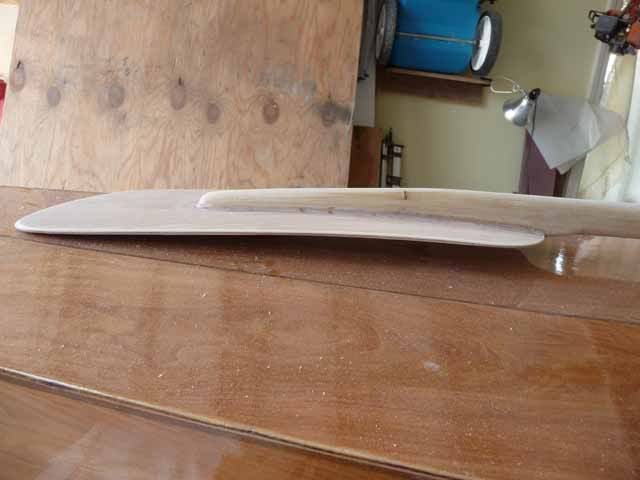
Also did some finish sanding on the paddle. Rounded off the edges of th blades and smoothed the transition to the shaft:
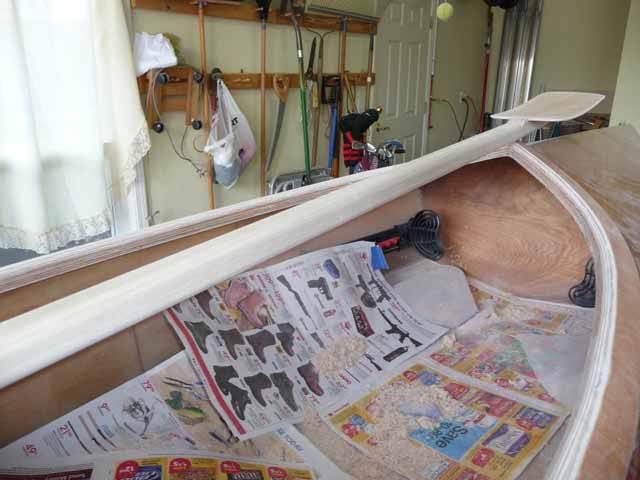
Also some sanding on the shaft. As you can see, the shaft is not perfectly round. There are small flat areas on each side:
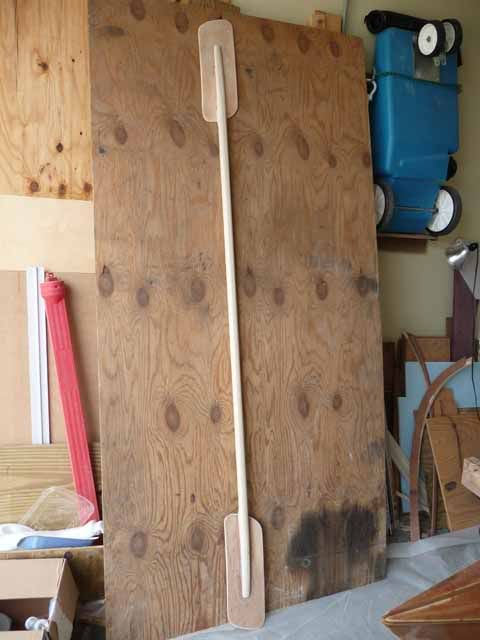
And the paddle ready for finishing:
Bruce


Also did some finish sanding on the paddle. Rounded off the edges of th blades and smoothed the transition to the shaft:

Also some sanding on the shaft. As you can see, the shaft is not perfectly round. There are small flat areas on each side:

And the paddle ready for finishing:

Bruce
I may look busy, but I'm only confused.