Strip Built Pirogue

Builder show and discuss their progress.
craiggamesh
Posts: 465
Joined: Mon Aug 04, 2008 12:01 am
Type of boat I like: <-- Please read instructions to the left and delete this text. Then, tell us what type boat you like! :-)
Location: Portland, Oregon

Strip Built Pirogue

Post by craiggamesh »

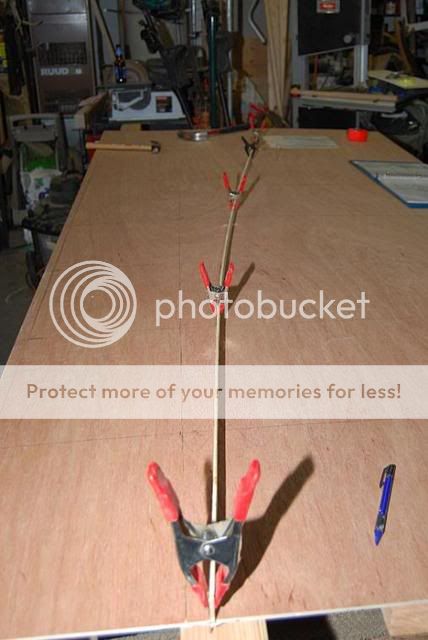
I followed Matt's instructions to cut out the ply wood templates. I put nails in at the control points and clamped a thin flexible strip to the nails and traced the lines.

Image

Finished tracing.
Image

I only traced one side panel and after it was cut and sanded to the line, i used it as a template to cut the other side with a flush cut router bit.
Here are all the panels cut out:
Image

Then I took the two eight foot lengths of Luan used to form the bottom template and butt jointed them with a butt block screwed on at the edge of the 2 pieces underneath. You can see the cedar and pine strips stacked below. I used a table saw and ripped them with a Freud 7 1/4 inch thin curf blade to 3/16 inch thick. The pine strips were 3/4 inch wide. The cedar was two widths, 3/4 and 1 1/2 inches wide. Since the panels were flat I was able to get away with using the wider strips. This would not have been the case if i was building a standard strip built boat with forms.
Image
Prior to stripping, I covered the plywood template with plastic so the strips would not end up being inadvertently glued to the plywood. Here you can see the bottom was completely stripped. Strips were edge glued and stapled to the template. I did not do cove and bead strips due to everything being flat.
Image
Then, a flush cut router bit is used to duplicate the shape of the template.

Image
Next, I thickened some epoxy with west systems 404 filler. I did not use much, just enough to thicken the epoxy to fill in any small cracks in the edge joints, but not enough to notice visually. I applied this sealer coat with a squeegy.
Image
When this coat was dry, I put a layer of 6 oz fiber glass cloth on the hull panel and applied epoxy with a squeegy. Two more coats were applied to fill the weave.
Image

After the final coat was dry, the extra fiberglass at the edge was trimmed flush with the edge of the hull panel.
Image

Craig
craiggamesh
Posts: 465
Joined: Mon Aug 04, 2008 12:01 am
Type of boat I like: <-- Please read instructions to the left and delete this text. Then, tell us what type boat you like! :-)
Location: Portland, Oregon

Post by craiggamesh »

Oops, i used the wrong picture as the last picture on my first post. I actually don't have a photo of the panel trimmed of the access fiber glass.
Kayak Jack
Design Reviewer
Posts: 1186
Joined: Sun Jun 20, 2004 8:03 pm
Type of boat I like: <-- Please read instructions to the left and delete this text. Then, tell us what type boat you like! :-)
Location: South-central Michigan

Post by Kayak Jack »

Good thinking process, Craig.
Kayak Jack
Doing what you like is FREEDOM
Liking what you do is HAPPINESS
I spent most of my money on whiskey and women - and I'm afraid I just wasted the rest.
craiggamesh
Posts: 465
Joined: Mon Aug 04, 2008 12:01 am
Type of boat I like: <-- Please read instructions to the left and delete this text. Then, tell us what type boat you like! :-)
Location: Portland, Oregon

Post by craiggamesh »

Thanks Jack. By the way I am a big Simpson's fan.

Anyways, I have a few minutes so I thought I would add some more. I stripped the sides in the same manner. For the design, I set up a jig on my miter saw to cut the three different length pieces involved. Here is a photo of the stripping process where I am laying out the design prior to gluing. Two very important items for this step can be seen in the image. Glue and beer. Not necessarily in that order.
Image

Here is a close up:
Image

Gluing the final strip on:
Image

Here is the design prior to planing and sanding:
Image

Planing the strips flush after using the flush cut bit:
Image

The panels were then sanded and seal coated just like the hull:
Image

After that, the panels were fiberglassed and had fill coats just like the hull. The advantage for me to do the fiberglassing while the panel laid flat, was I didn't have to worry about runs which made for less sanding (also it kept the glue joints from possibly breaking).

Craig
craiggamesh
Posts: 465
Joined: Mon Aug 04, 2008 12:01 am
Type of boat I like: <-- Please read instructions to the left and delete this text. Then, tell us what type boat you like! :-)
Location: Portland, Oregon

Post by craiggamesh »

Both boys are napping an the wife is gone. Now I can add some more:

I followed Matt's instructions to do the stitching. I used some very small galvanized wire that I had for as long as I can remember. It has been in a drawer and I figured some day there would be a purpose for it.
Image

I used craft sticks I bought years ago for a different project and then never used. I cut the sticks into smaller pieces amd cut a "v" notch in them so they would fit on each side of the wire. I was too lazy to drill holes like it said in the plans.
Image

I placed the sides of the panels which were already fiber-glassed to the inside. I feel that fiberglassing the inside is much harder than the outside so I thought this would make it easier.
Image

Here is the finished stitching job. I made sure the two saw horses were level with each other as per the plans.
Image

Craig
coogzilla
Posts: 101
Joined: Sat Apr 05, 2008 4:27 pm
Type of boat I like: <-- Please read instructions to the left and delete this text. Then, tell us what type boat you like! :-)
Location: Southern California

Post by coogzilla »

Thats really cool. Looks easy, but... I could mess it up.
The beers a good idea. I saw those clamps ya made. Look
like they work ok. Are they pretty strong? Nice work!

Coogs
JEMWATERCRAFT:
Touring Pirogue-
craiggamesh
Posts: 465
Joined: Mon Aug 04, 2008 12:01 am
Type of boat I like: <-- Please read instructions to the left and delete this text. Then, tell us what type boat you like! :-)
Location: Portland, Oregon

Post by craiggamesh »

Yes the clamps were strong. I used them to glue on the slotted inwale and outwale. I wouldn't trust them to put enough pressure for carpenters glue, but epoxy does not require nearly as much pressure.
craiggamesh
Posts: 465
Joined: Mon Aug 04, 2008 12:01 am
Type of boat I like: <-- Please read instructions to the left and delete this text. Then, tell us what type boat you like! :-)
Location: Portland, Oregon

Post by craiggamesh »

Stitching on the bottom was also done as per the plans. Again, I made sure the saw horses were level after flipping the boat. I the placed the hull panel on with the fiber-glassed surface to the inside.
Image

Here is another view next to the luan hull template.
Image

I marked the hole locations and drilled stitch holes in the hull. In the previous post, I had forgot to mention that I had drilled the holes in the sides as per the plans. I then stitched the hull to the sides.
Image

Finished stitching
Image


Craig
Kayak Jack
Design Reviewer
Posts: 1186
Joined: Sun Jun 20, 2004 8:03 pm
Type of boat I like: <-- Please read instructions to the left and delete this text. Then, tell us what type boat you like! :-)
Location: South-central Michigan

Post by Kayak Jack »

Chuck made a nice, redwood stripper pirogue in a similar fashion. Made flat, strip panels, then made the panels into a boat.

Craig, you wouldn't believe that there are paddlers who think that you cannot - should not make boats of wood. Of course, you have to totally ignore about 50,000 years of history to think that way. But - they're out there.
Kayak Jack
Doing what you like is FREEDOM
Liking what you do is HAPPINESS
I spent most of my money on whiskey and women - and I'm afraid I just wasted the rest.
Oldsparkey
Design Reviewer
Posts: 1272
Joined: Sat Jun 19, 2004 11:08 am
Type of boat I like: Wood boats .
Location: Somewhere around Central Florida
Contact:

Post by Oldsparkey »

Kayak Jack wrote:Chuck made a nice, redwood stripper pirogue in a similar fashion. Made flat, strip panels, then made the panels into a boat.

Craig, you wouldn't believe that there are paddlers who think that you cannot - should not make boats of wood. Of course, you have to totally ignore about 50,000 years of history to think that way. But - they're out there.
Jack is 100% correct. I did (basically ) the same thing with Red Wood in March 06 but with a different designers pirogue. Plus it did not have the thought or art work in it that Craig has in his. Mine is a stripper Craigs is a work of art. :D

Chuck.
Remember:
Amateurs built the Ark...... Professionals built the Titanic
Visit some fine paddlers at The Southern Paddler
Post Reply