Terry, there's a bit easier way to do end pours. Take the cardboard back off of a loose leaf writing tablet. Cut out an isosceles triangle, say 4"-5" high, and 4" wide at the base.
Fold it down the long centerline, Turn it upside down so the long point is down. With your boat sitting normally. tape it into the stem end of your boat BEFORE the deck goes on. The first epoxy should be thickened about like peanut butter to seal off the taped joints and bottom end. Then, you can pour in odd left overs from various jobs around the boat.
If the boat will have long decks, I tie a short chunk of cord onto a small pulley, and put the cord down into the epoxy with the pulley hanging out. BEFORE your put decks on, run ropes through the pulleys. Ropes should be long enough to reach the center of the boat, and return to the pulley. Tie the ends of the bow rope together. Loop the stern rope through its pulley and the bow rope, and then tie its ends together.
Bind on a 4' piece of stout cord onto each rope at the knot. Have about 3' hanging out on one end to tie around a small, lightweight bundle to be slud up into each stem ends, and retrieved. When you pull that bundle into the ends, be simultaneously pushing with a paddle, it will go further up in and give more room for more gear.
You DO want to take more gear - don't you??!!
Touring T-V (SS) Electric
-
Kayak Jack
- Design Reviewer
- Posts: 1186
- Joined: Sun Jun 20, 2004 8:03 pm
- Type of boat I like: <-- Please read instructions to the left and delete this text. Then, tell us what type boat you like! :-)
- Location: South-central Michigan
-
tw541
- Posts: 73
- Joined: Thu Feb 28, 2008 8:19 pm
- Type of boat I like: All boats
- Location: Mountain Home, Arkansas
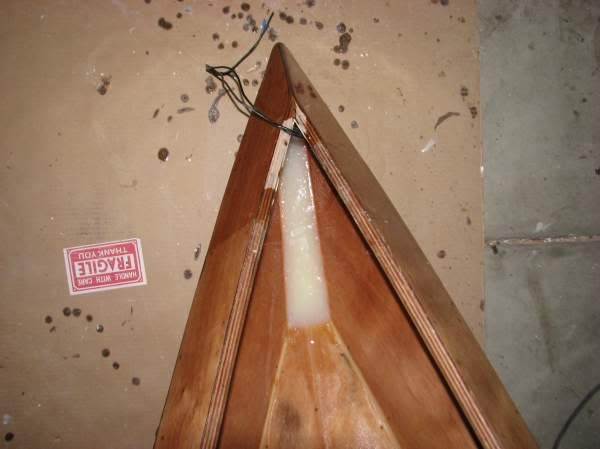
Jack, thats kind of the way I did it on the Swamp Girl, except I did all the pour at once. I wanted this to be a little different. I wanted the epoxy mix to flow all the way into the sharp bow. I basically wanted a really thick fillet extending all the way up. I used fumed silica because it is supposed to set up really hard. (And because I had it and wanted to try it!) I later mixed up more with wood flour pretty thick and packed each end solid for about three inches from the end. I am going to use bow eyes on these boats because they will probably be trailered at some time. I am happy with the way the pours turned out. They are fairly even and flat for the whole length. This will give a solid mounting for the bow eyes. These boats will have a small front deck, but it will be sealed and filled with expanding foam. Like I have said before, I am striving for maximum strength and not minimum weight. These boats will be used hard in a tough environment for many years.

Terry
-
Kayak Jack
- Design Reviewer
- Posts: 1186
- Joined: Sun Jun 20, 2004 8:03 pm
- Type of boat I like: <-- Please read instructions to the left and delete this text. Then, tell us what type boat you like! :-)
- Location: South-central Michigan
I think I follow you, Terry. On mine, I drilled the holes just above the water line. that way, if I have to stand on shore, hanging on to lines to both the front and rear of a boat, and adjust the angle of it to remain in the stream as I walk it up or down rapids, the line of force is low and the boat won't try to tip over. If I had lines mounted high, the current would push on the bottom of the boat, rope would pull on the top, and the boat will lean over into the current.
Kayak Jack
Doing what you like is FREEDOM
Liking what you do is HAPPINESS
I spent most of my money on whiskey and women - and I'm afraid I just wasted the rest.
Doing what you like is FREEDOM
Liking what you do is HAPPINESS
I spent most of my money on whiskey and women - and I'm afraid I just wasted the rest.
-
tw541
- Posts: 73
- Joined: Thu Feb 28, 2008 8:19 pm
- Type of boat I like: All boats
- Location: Mountain Home, Arkansas
I have been working a lot on these boats, but is on stuff that I cannot really see that I have done much. I know it is stuff that has to be done, but sometimes I can't see much difference after a busy day's work. Sanding and applying filler coats has to be done, but I am ready to be through with that part. However, I now have two layers of fiberglass on inside and out. One layer is at a 45 degree angle to the boat centerline. Next time I will look into bias cloth instead of doing it this way. This was a LOT of work. I'm glad I did it though, these boats will be really strong.
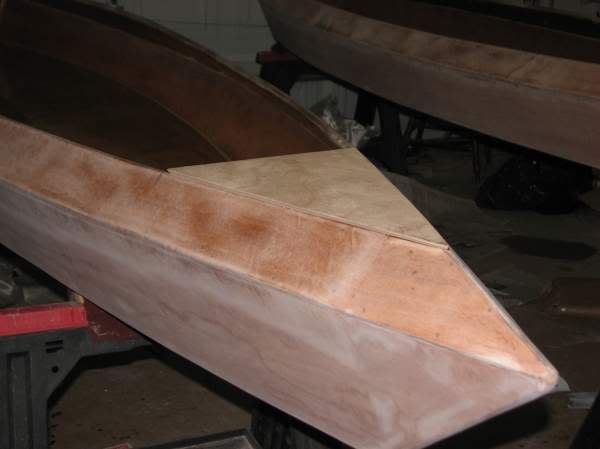
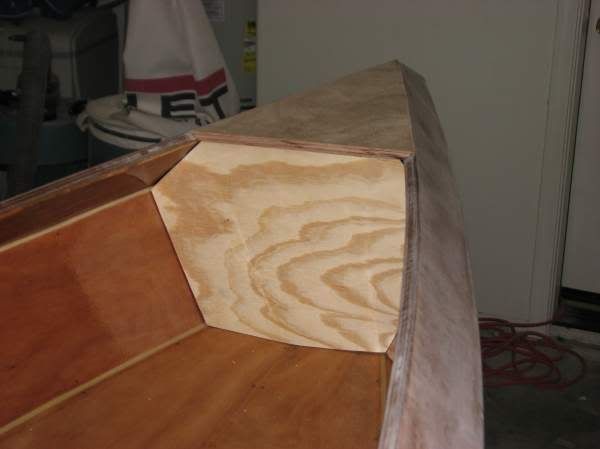
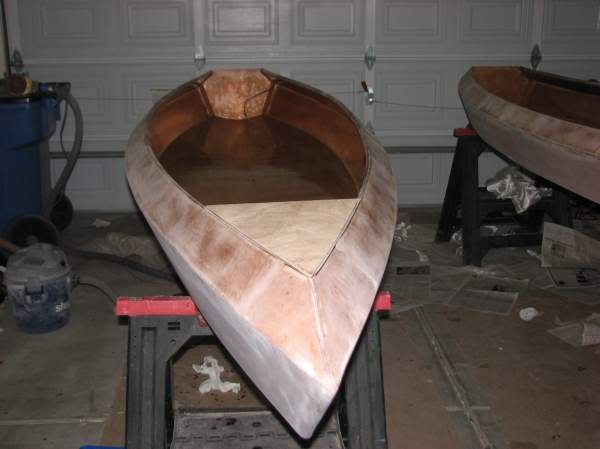
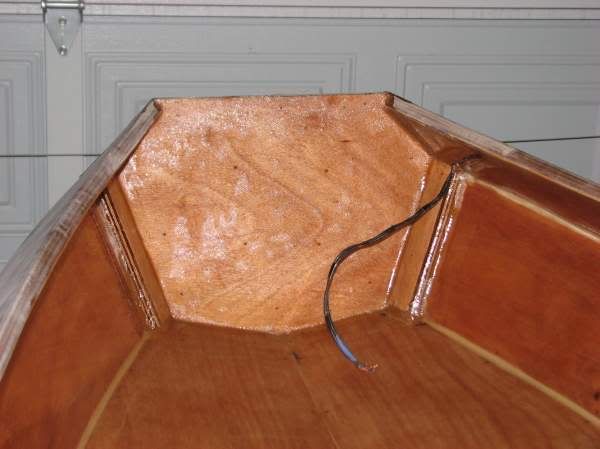
I have the pattern pieces for the bow deck and bulkhead cut and set in place on this boat. Before installing the permanent deck piece, I will fill the space with expanding foam. I am still debating on whether or not to put a round access hatch and a small storage space in the bow. It will probably never be used if I do, since I cannot reach it while in the boat. The light color of the fillets is because I used glass balls along with the wood flour. I used half wood flour and half glass balls. I will not build another boat without using them in the fillet material. I used straight wood flour in the Swamp Girl I built. The difference in the amount of work involved in sanding is amazing. I probably spent 15 minutes sanding all fillets on both of these boats. Of course, the best way is to make them smooth enough to not need much sanding.
I am almost through with the inside and ouside fiberglass. A light sanding in the morning and one more filler coat and I will be through with the inside. That will leave glassing in the decks. The back will be decked for about 4.5 feet with a hatch for a large storage area and a cutout for the livewell right behind the seat.
I put two layers of glass on both sides of the transom. It is 3/4" thick and I put in braces on the inside. With the bracing the deck adds, it should handle the fairly large trolling motors without problem.
I will need to take one of them to the water soon to work on placement of the heavy items. I will have two batteries, a 12 gallon aerated livewell, and assorted other items. I will locate the seat position with the livewell directly behind. I will use the placement of the batteries to adjust the trim of the boat.
I have the pattern pieces for the bow deck and bulkhead cut and set in place on this boat. Before installing the permanent deck piece, I will fill the space with expanding foam. I am still debating on whether or not to put a round access hatch and a small storage space in the bow. It will probably never be used if I do, since I cannot reach it while in the boat. The light color of the fillets is because I used glass balls along with the wood flour. I used half wood flour and half glass balls. I will not build another boat without using them in the fillet material. I used straight wood flour in the Swamp Girl I built. The difference in the amount of work involved in sanding is amazing. I probably spent 15 minutes sanding all fillets on both of these boats. Of course, the best way is to make them smooth enough to not need much sanding.


I am almost through with the inside and ouside fiberglass. A light sanding in the morning and one more filler coat and I will be through with the inside. That will leave glassing in the decks. The back will be decked for about 4.5 feet with a hatch for a large storage area and a cutout for the livewell right behind the seat.

I put two layers of glass on both sides of the transom. It is 3/4" thick and I put in braces on the inside. With the bracing the deck adds, it should handle the fairly large trolling motors without problem.

I will need to take one of them to the water soon to work on placement of the heavy items. I will have two batteries, a 12 gallon aerated livewell, and assorted other items. I will locate the seat position with the livewell directly behind. I will use the placement of the batteries to adjust the trim of the boat.
Terry
-
Oldsparkey
- Design Reviewer
- Posts: 1272
- Joined: Sat Jun 19, 2004 11:08 am
- Type of boat I like: Wood boats .
- Location: Somewhere around Central Florida
- Contact:
The glass bubbles do make it a lot easier on the sanding over sanding just the wood flour and epoxy mix.tw541 wrote: The light color of the fillets is because I used glass balls along with the wood flour. I used half wood flour and half glass balls. I will not build another boat without using them in the fillet material. I used straight wood flour in the Swamp Girl I built. The difference in the amount of work involved in sanding is amazing. I probably spent 15 minutes sanding all fillets on both of these boats. Of course, the best way is to make them smooth enough to not need much sanding.
They also help to keep the weight down on the fillets along with extending the amount of epoxy needed. Same amount of epoxy as in any mix but the glass bubbles give you more filler then just the wood flour , since the bubbles don't absorb the epoxy.
As you said the difference in the work required is a lot less. I started using them several boats ago and always make sure I have plenty on hand when starting another boat. I'm not sure if I got smarter or lazier , my bet is on the latter one.
All I know is they work for me and it sounds like they work for you just as well.
This build I'm doing at this time , I found a trick for doing even less sanding.
When I pulled the tape there was a rough edge , I took a cheep bristle brush and dipped it in acetone , then brushed the fillet with it and the rough edge vanished , the fillet is nice and sharp with no roughness to it.
Chuck.
Remember:
Amateurs built the Ark...... Professionals built the Titanic
Visit some fine paddlers at The Southern Paddler
Amateurs built the Ark...... Professionals built the Titanic
Visit some fine paddlers at The Southern Paddler
-
tw541
- Posts: 73
- Joined: Thu Feb 28, 2008 8:19 pm
- Type of boat I like: All boats
- Location: Mountain Home, Arkansas
Chuck. I'll try that on the next boat. It sounds like it could almost eliminate sanding the fillets. The only bad thing I have read about the glass bubbles is in Aircraft Spruce catalog. I buy stuff from them occasionally. They warn to NEVER use the glass bubbles between layers of fiberglass. That would probably not come up with a boat, but it might with building a plane using multiple layers of fiberglass over foam. The tolerances those guys work to requires an incredible amount of fairing and sanding. I have a friend building one and he has spent over a year on the wings. I don't like sanding that much.I took a cheep bristle brush and dipped it in acetone , then brushed the fillet with it and the rough edge vanished , the fillet is nice and sharp with no roughness to it.
Terry
-
scottrunnr
- Posts: 389
- Joined: Sun Apr 23, 2006 8:34 pm
- Type of boat I like: <-- Please read instructions to the left and delete this text. Then, tell us what type boat you like! :-)
- Location: Brookline, MA
-
tw541
- Posts: 73
- Joined: Thu Feb 28, 2008 8:19 pm
- Type of boat I like: All boats
- Location: Mountain Home, Arkansas
The glass bubbles are very tiny hollow glass bubbles. They appear to be a very fine powder, and must be handled with care, as they float in the air readily. The actually look like talcum powder or maybe wheat flour, but are very light weight. I would not use them without using a respirator. I also would not use them anywhere but in the fillets. I used a 50-50 mix of glass bubbles and wood flour on the 2 boats I am building now. I can say that I will not build another boat without them, they saved a lot of work sanding. I suspect there will be less strength if used for adhesive purposes, over using straight wood flour or silica. I think that is why Aircraft Spruce says to not use them between layers of fiberglass. I got mine from Raka. Look on their website under fillers. Most suppliers of epoxy sell them as a filler. They are NOT the same product as phenolic microballoons. I have no experience with that product. I like using the glass bubbles and will in the future. This is a product with many more benefits that drawbacks, in my humble opinion.
Terry
-
dangermouse01
- Posts: 200
- Joined: Mon Jul 31, 2006 6:32 pm
- Type of boat I like: <-- Please read instructions to the left and delete this text. Then, tell us what type boat you like! :-)
- Location: Palm Bay, FL (east coast)
Scott;scottrunnr wrote:What are the glass balls? Is it a West System product? Can you provide a link to the product? It sounds very useful! No loss of strengh vs. straight wood flour I assume. Are there any drawbacks vs. straight wood flour other than the color?
The glass balls & phenolic micro balloons are both considered bulking agents. They add volume to epoxy while adding minimal additional weight. OK for fillets & end pours, not for gluing or bonding.
Heres a link that gives descriptions & uses of stuff like glass balls, ballons, wood flour, cab-o-sil........
http://www.plasticareinc.com/SystemThree_Fillers.htm
DM
-
tw541
- Posts: 73
- Joined: Thu Feb 28, 2008 8:19 pm
- Type of boat I like: All boats
- Location: Mountain Home, Arkansas
I've been working a lot on these boats, but do not always seem to have a lot to show for it. I'm fighting an old shoulder injury and cannot seem to do as much as I would like. I still do not like the doctor's solution of a sharp knife. I did get the front decks and bulkheads done. I was going to add a small enclosed storage compartment behing the bulkhead and pour expanding foam around it. I bought the foam, but decided to leave the compartments empty. The round access hatch is supposed to be waterproof. I decided to try them on an old plastic container I had. I cut and installed the hatches, using silicone sealer to seal them in place. The next day I filled the container with water and let it set for a few hours. One of the hatches didn't leak a drop, the other leaked maybe a teaspoon in thee or four hours. It had an O'ring that wanted to come out every time I opened it. I glued the ring in place, and I think that solved the leak. Since these hatches and the compartment itself is waterproof, I decided to leave out the foam.
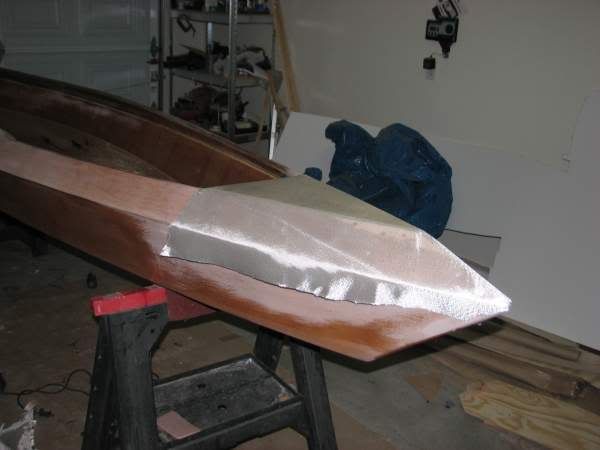
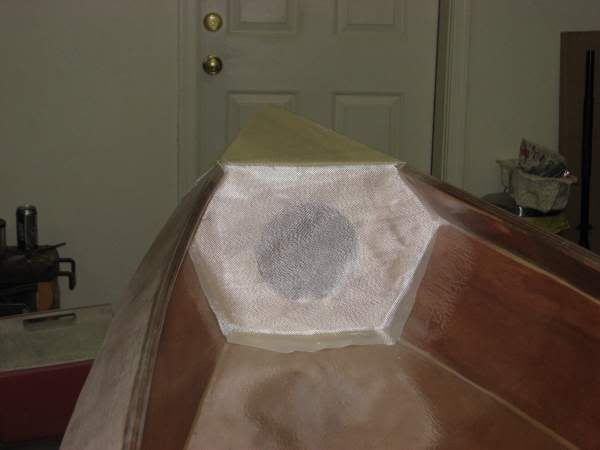
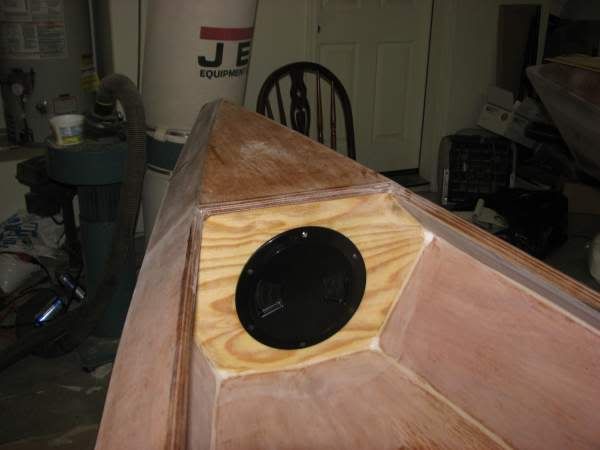
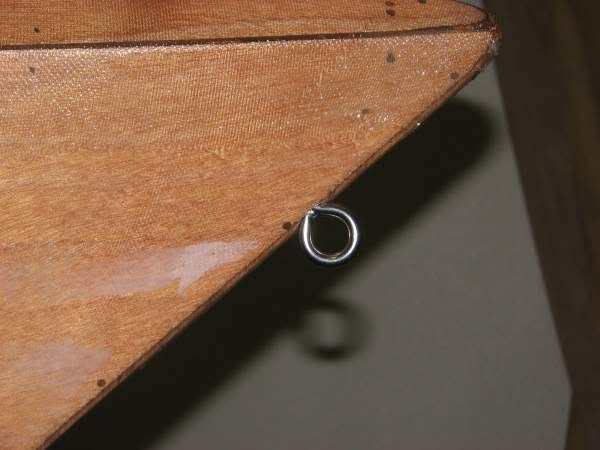
I drilled the holes for the bow eyes through the fumed silica end pours I did. I quickly burned up a new brad point bit, and had to finish with a metal cutting bit. That is some hard stuff.
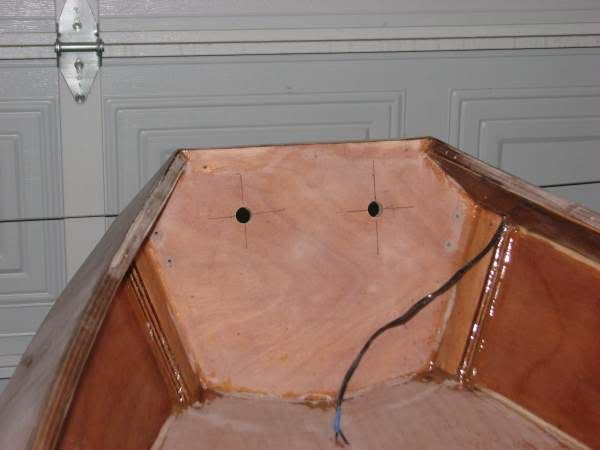
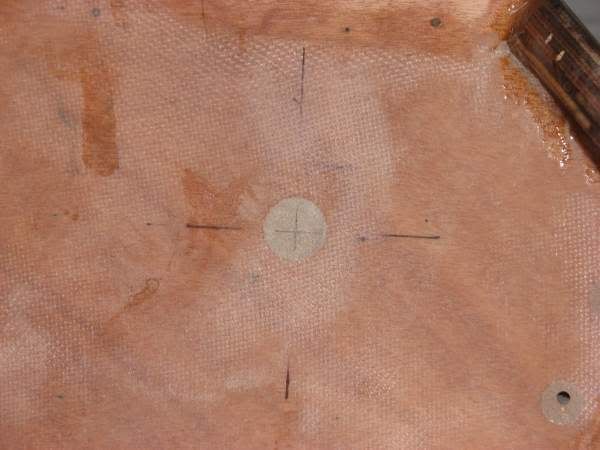
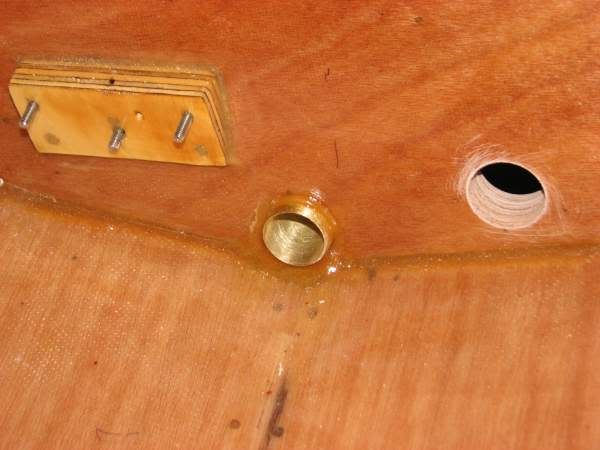
On all holes through the hull, I drill the holes oversize and then fill with epoxy and wood flour mix. I mark the center of the original pilot holes with large marks that will be visible after sanding the filler. This lets me mark the center of the hole in the original place for drilling to the correct diameter.
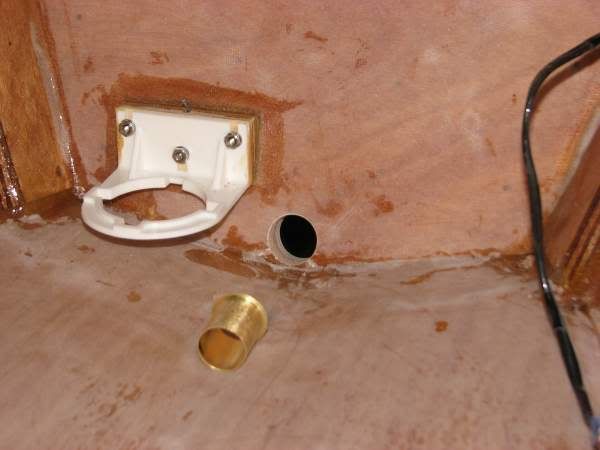
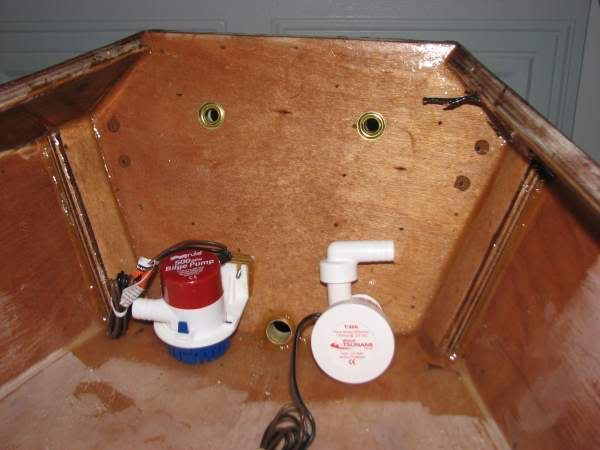
I installed the brass drain plug tube, and mounts for the bilge and livewell pumps.


I drilled the holes for the bow eyes through the fumed silica end pours I did. I quickly burned up a new brad point bit, and had to finish with a metal cutting bit. That is some hard stuff.

On all holes through the hull, I drill the holes oversize and then fill with epoxy and wood flour mix. I mark the center of the original pilot holes with large marks that will be visible after sanding the filler. This lets me mark the center of the hole in the original place for drilling to the correct diameter.


I installed the brass drain plug tube, and mounts for the bilge and livewell pumps.


Terry